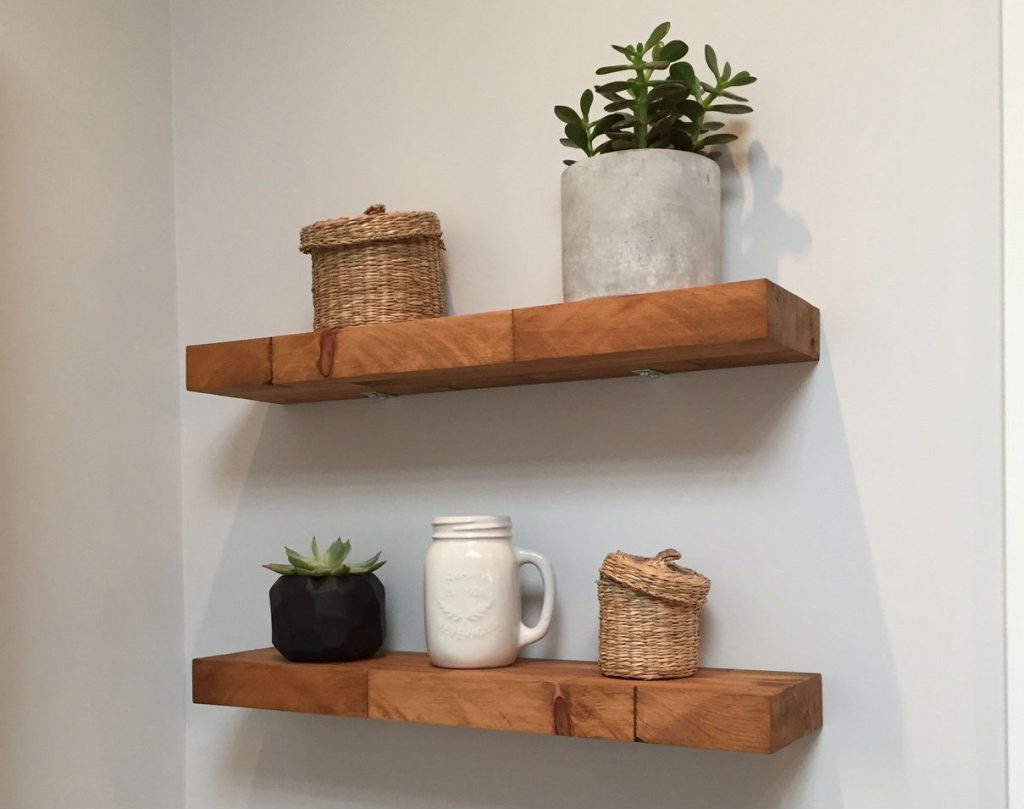
Create floating butcher block wood shelves made from reclaimed old solid oak doors.
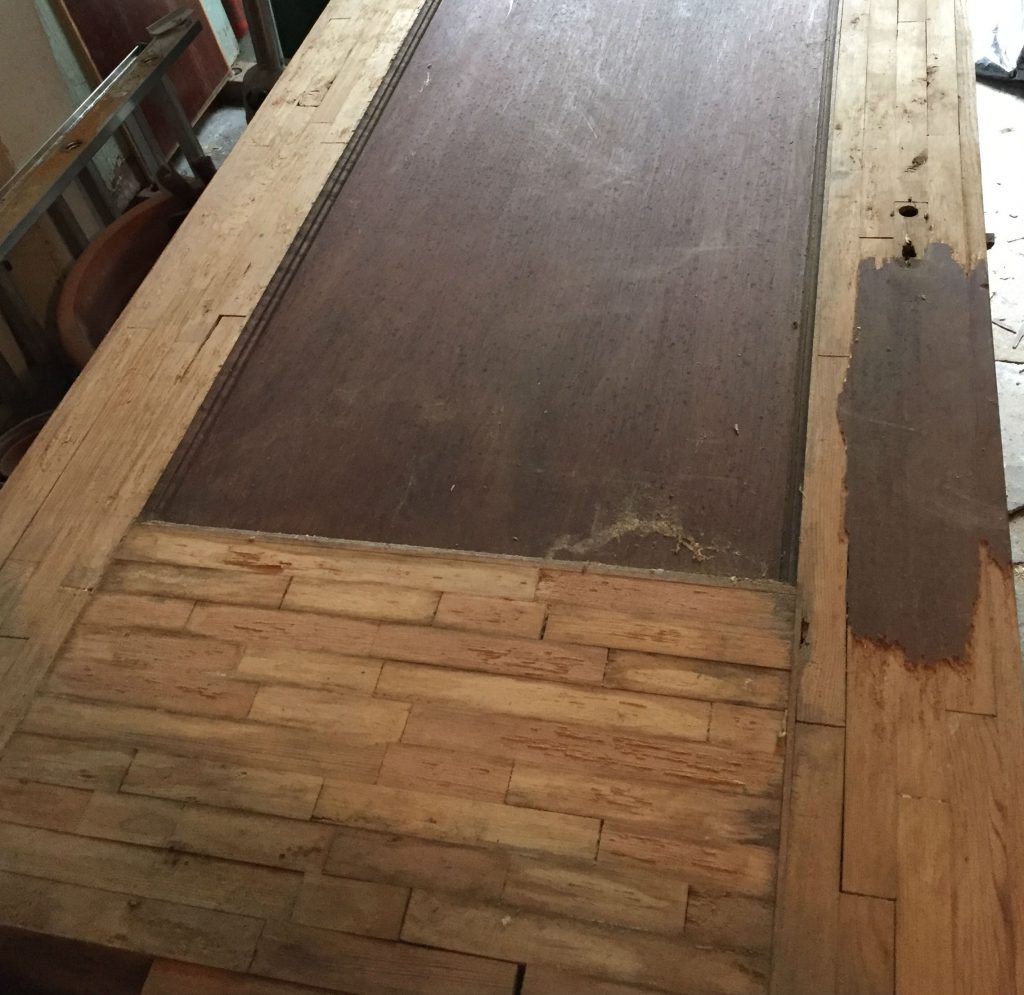
To my surprise, those 100 year old doors that they call “solid wood” aren’t made from solid wood. Instead, they’re actually made up of many small oak wood blocks glued together like butcher block. Then the door is assembled with various mortise & tenon and dowel techniques and then covered with wood veneer.
I found this out when looking at some old oak doors left behind in my garage by the previous home owners. Unfortunately the doors had been stored directly on the cement floor and had been exposed to years of water damage. This caused the wood veneer to start peeling off from the butcher block core.
I was heartbroken to see the state these century old doors were in and began to ask myself how I was going to dispose of them. Then as I started to peel back the veneer and uncover the beautiful old wood blocks underneath, I just couldn’t resist the urge to re-purpose them and transform them into something new. Also see my post about upcycling doors into a coffee table.
 Here’s what you’ll need:
- Old solid wood door
- Heat gun
- Putty knife
- Orbital sander with 60-grit sandpaper
- Regular 180 or 220-grit sandpaper
- Circular saw
- Table saw (optional)
- Wood stain and/or varnish
- Drill
- Level
- Plastic wall anchors & screws (4)
- Round head 1″ wood screws
- Corner braces (4)
Peel off the wood veneer with the help of a heat gun
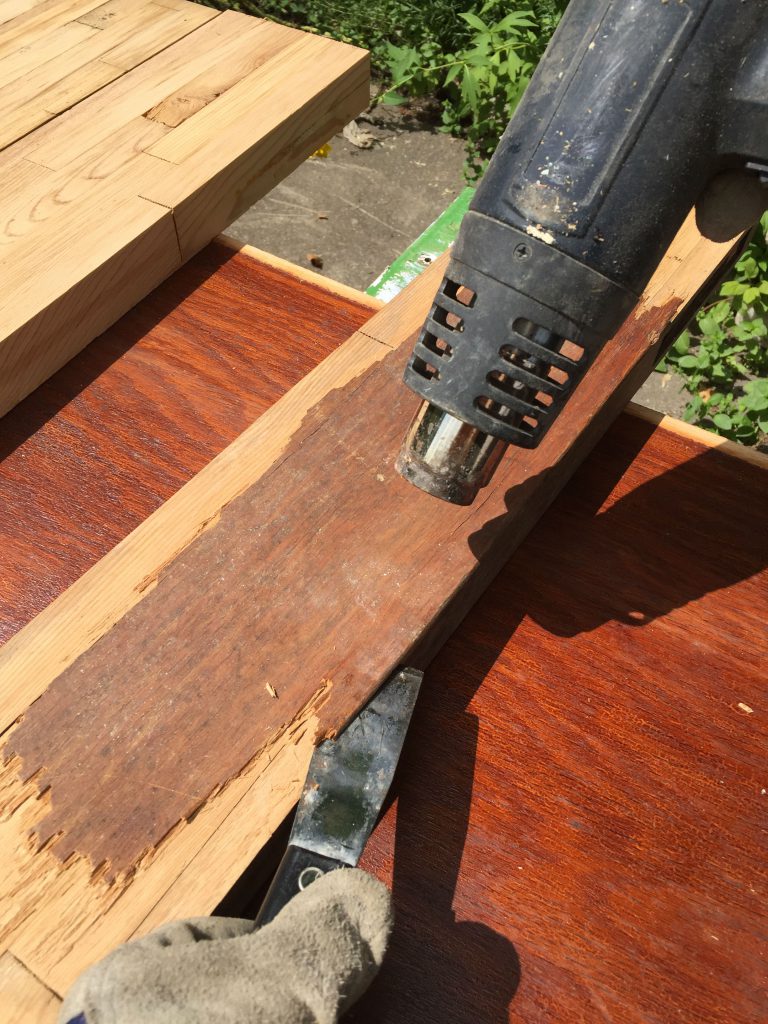
The first step was to peel off the veneer from both sides of the door. This step can be a bit tedious – they used really strong glue back in the day! To do this I laid the door on some horse saws and used a heat gun on the high setting with a 4″ putty knife to slowly heat the glue and peel off the wood veneer. Warning: please do this outside or in a well vented area to avoid inhaling the fumes. If there is still any hardware on the door (handle, mortise lock set, and hinges) now is also a good time to remove them.
Cut out sections from the door using a circular saw
Next you’ll want to cut out the sections you want to use depending on the desired size of the shelves. In my case, I used the bottom middle panel of the door to make two 21″ x 5″ shelves. I cut out the entire bottom middle panel first to make it easier and later cut them down to the exact size.
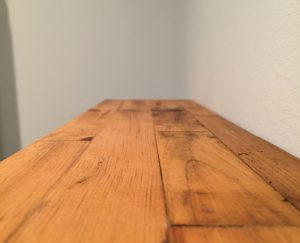
Sand down the sections with 60-grit sandpaper using an orbital sander
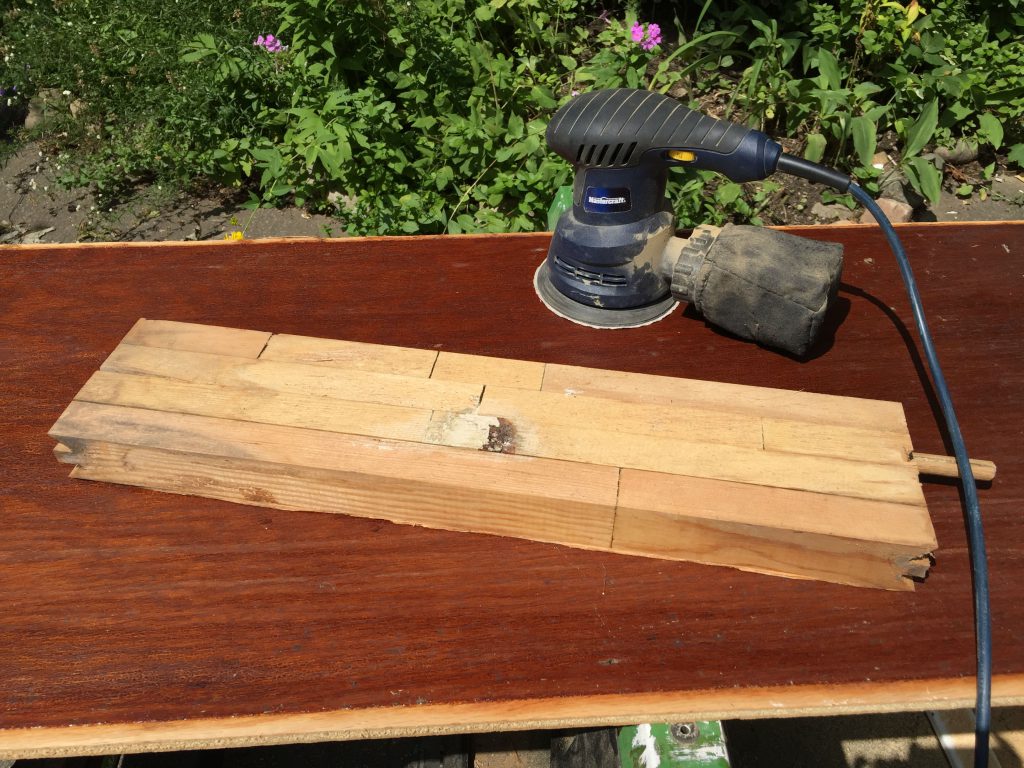
Next, use an orbital sander on high speed with some coarse sandpaper to get rid of the glue residue. I used 60 grit, but you can go up to 80 grit if that’s all you have on hand.
Make the final “clean” cut (if desired) using a table saw
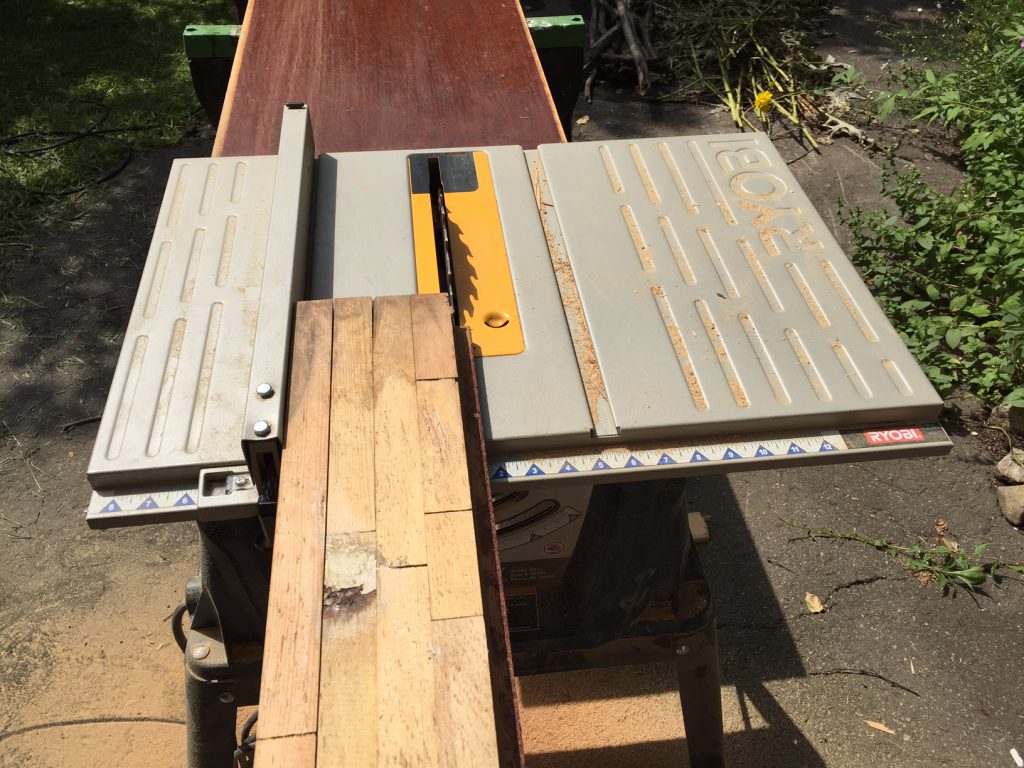
Now it’s time to cut them down to size. I kept the full bottom panel width (21″) but used a table saw to accurately cut them to 5″ wide. If you’re uncomfortable using a table saw, you can use a circular saw. I find it difficult to make perfectly straight cuts using a circular saw, but you can use a cutting guide to make accurate cuts. I show you how to build this simple guide here. If you’re using a table saw, make sure you’re cutting with the grain, i.e. you want the long wood edges parallel to the wall when installing. Set your table saw guide to 5″ and make the cuts.
Hand sand using 180 or 220-grit sandpaper
Now that we have our shelves cut, you’ll want to sand them down again, this time using a finer grit paper to get that smooth finish. I recommend going with 180-grit or even 220-grit. Sand with the grain. I also strongly advise to do this step by hand instead of using a power sander. This is to avoid seeing any circular marks in the wood once you apply the stain. You may not see them now, but they’ll be an eyesore later.
Stain
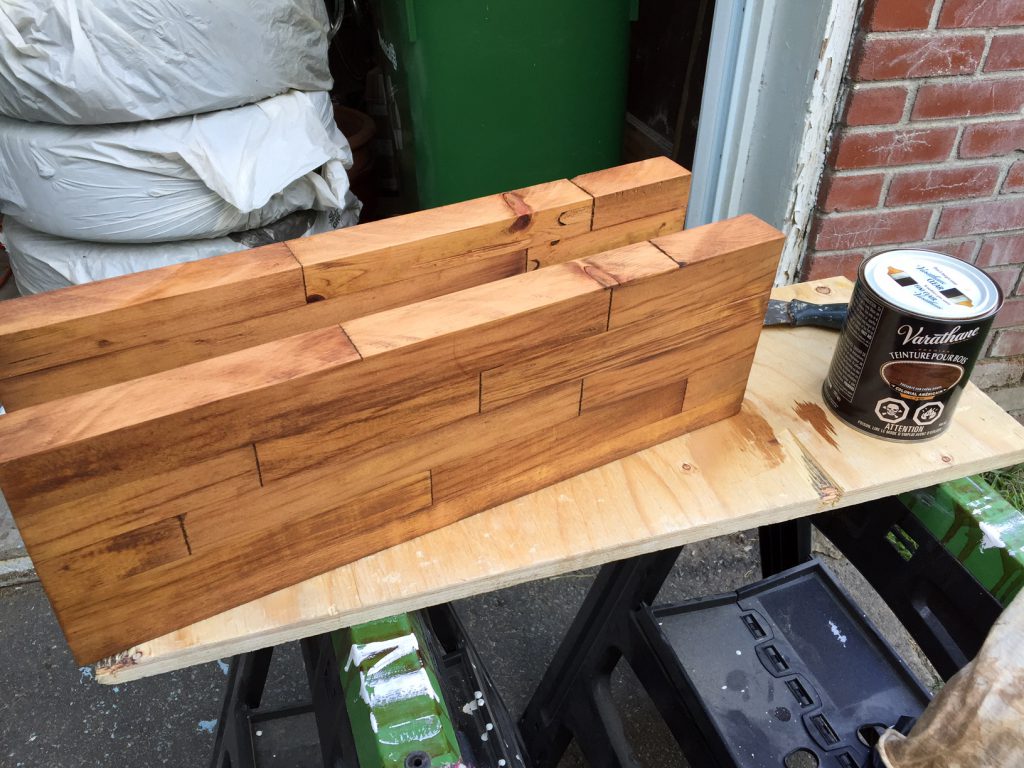
Now you’re ready to apply the finishes. I simply stained them using a single coat of Varathane early american premium wood stain. I applied the stain using a clean cloth then almost immediately wiped them down with a clean lint free cloth. Because the wood was already slightly darkened due to its age, I wanted to avoid making it too dark, so this process was just perfect. If you prefer the natural look, you can skip the stain and just apply a few coats of varnish.
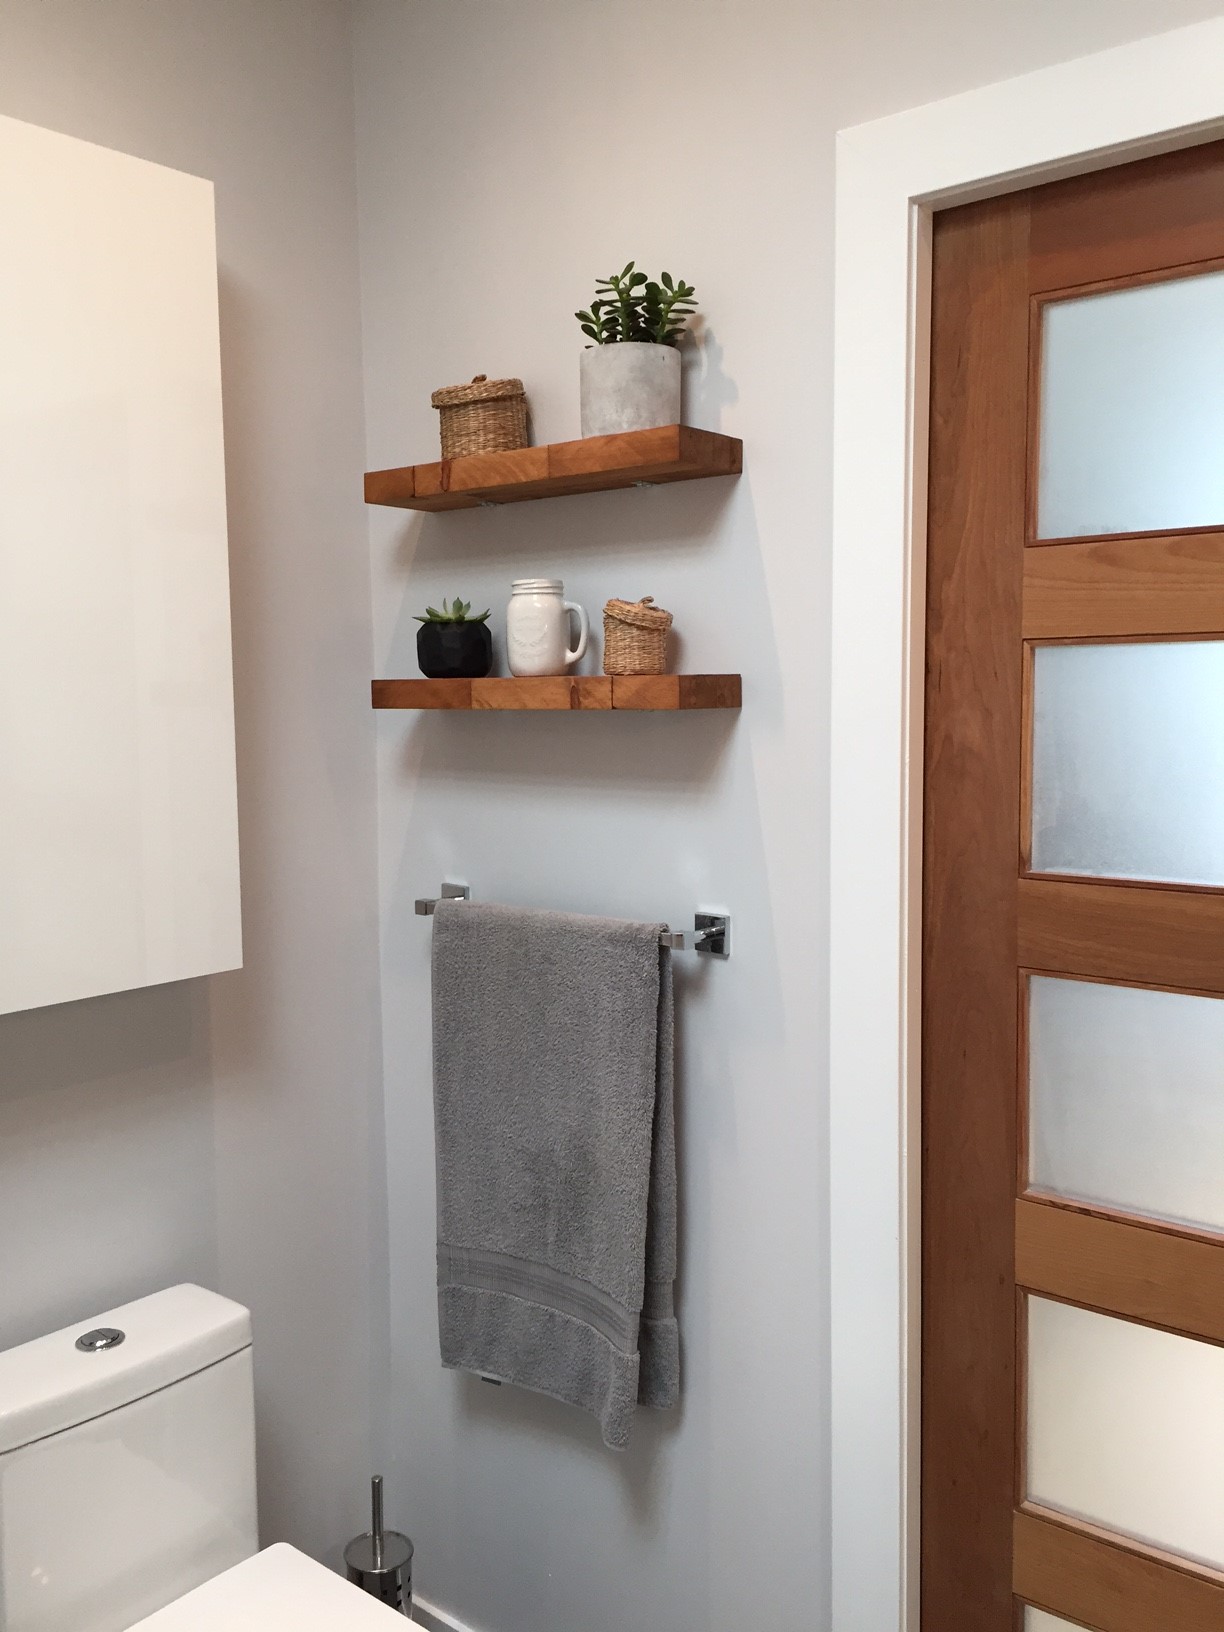
Hang the shelves
The final step is the installation, possibly the most challenging step in my book.
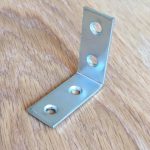
1.5″ x 1.5″ corner brace
In the end since these shelves were so light and wouldn’t be bearing much weight, I went with simple metal corner brace. These cost just over $1 apiece and can be found at your local Home Depot. I also used plastic wall anchors to attach the shelves to the drywall.
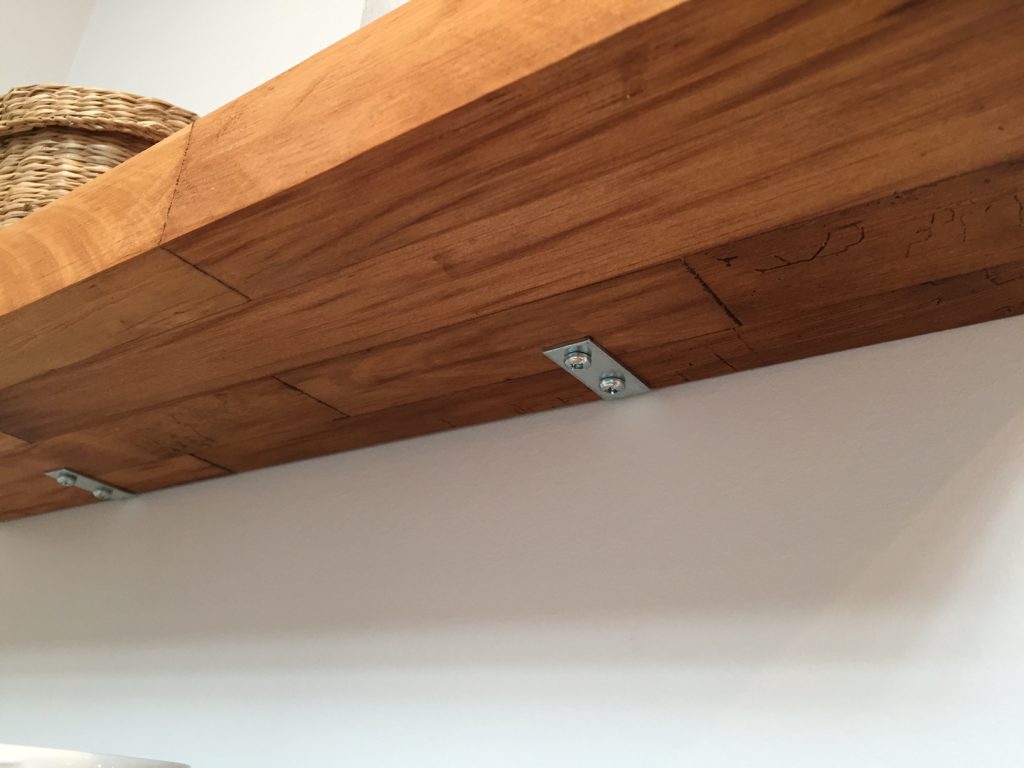
Start by determining the height you want and use a level to draw a horizontal line on the wall with a pencil. Next, use the recommended drill bit size to make 2 holes along the line you drew. Tap in the plastic wall anchors. Then hold the corner brace into position (with the angle bracket on the bottom side) and screw it into the plastic anchor. Finally, position the shelf so it sits on the corner brackets and screw the brackets to the underside of the shelf using round head screws.
Repeat for shelf number 2 and you’re done!