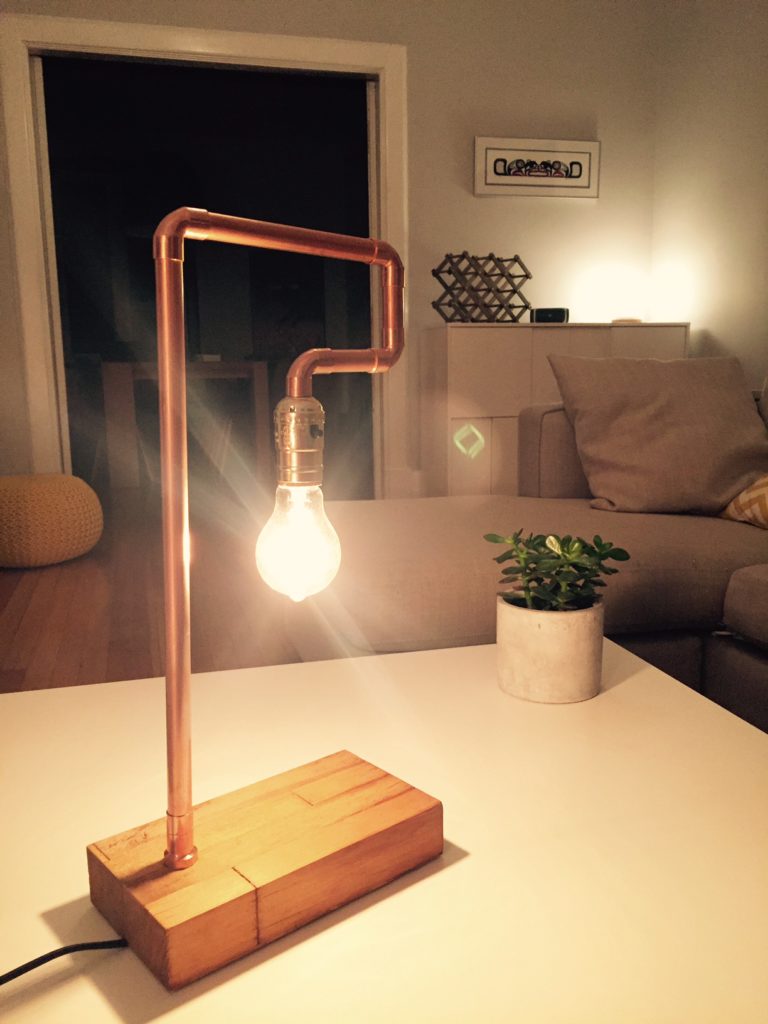
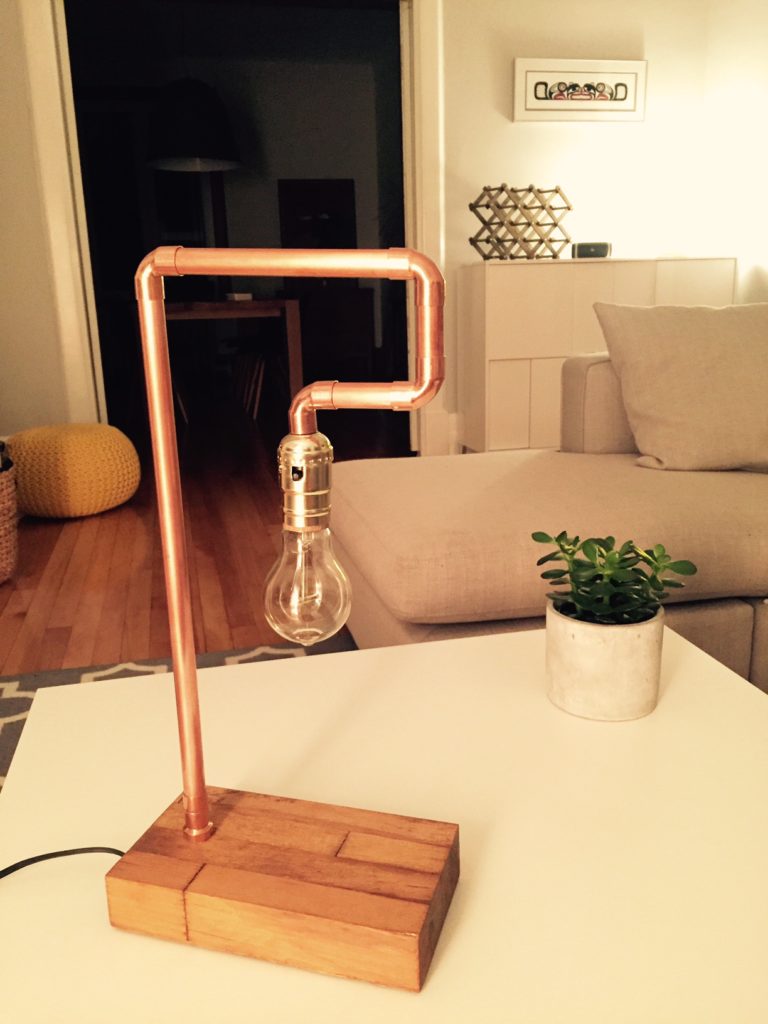
Industrial chic copper pipe table lamp
My recent copper pipe wall sconce tutorial inspired me to experiment further with copper pipe lighting. I mean, what’s not to love about a copper pipe lamp? It’s modern, yet industrial, and oh so easy to do-it-yourself.
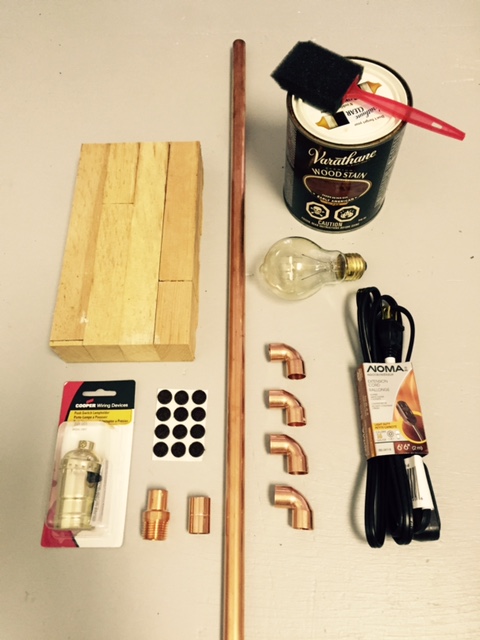
Here’s what you’ll need:
- (1) 3 foot ½” copper pipe (cut to 15″, 6″, 2 ½” and 2″)
- (4) ½” 90° copper elbows
- (1) ½” copper coupling
- (1) ½” copper threaded male adapter fitting
- Push through light socket
- Lamp wire
- Vintage ‘Edison’ lightbulb
- Piece of wood 5″ x 9″ x 2″
- Wood stain (color: Early American)
- Felt pads
Tools:
- ¾” drill bit (spade)
- Drill
- Tape measure
- Pipe cutter or hack saw
- Sandpaper (medium to fine)
- Sponge applicator or rag
- Adjustable wrench
- Wire stipper
- Silicone caulk or Weldbond glue
- Router (optional)
PROJECT UPDATE – July 2017
I decided to revisit this project and think I manged to improve upon it! I documented the revisited version in the video below.
Drill a hole through the wood base
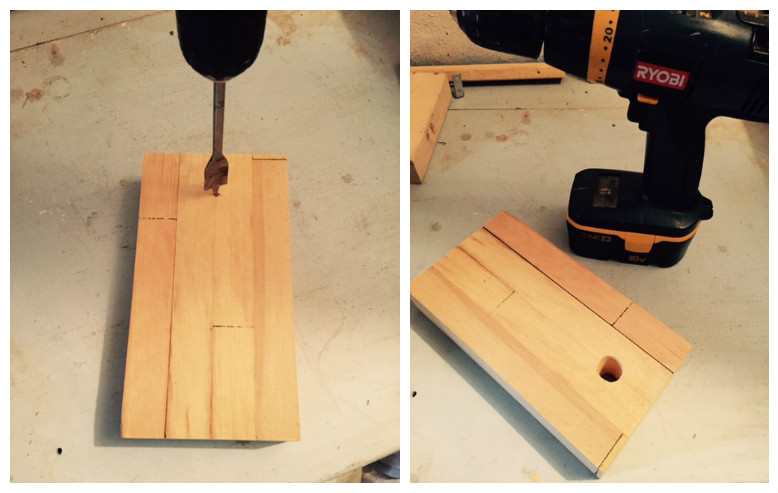
Find a piece of wood approx. 5″ x 9″ x 2″ for the base. I had a beautiful piece of left over butcher block that I salvaged from an old solid oak door in my floating shelves projects so I used that as my base.
Measure and mark a spot 1 ½” from the shorter edge of the wood base. Then drill all the way through the base using a ¾” spade bit. Tip: it’s easier if you make a pilot hole first.
Sand and stain the base
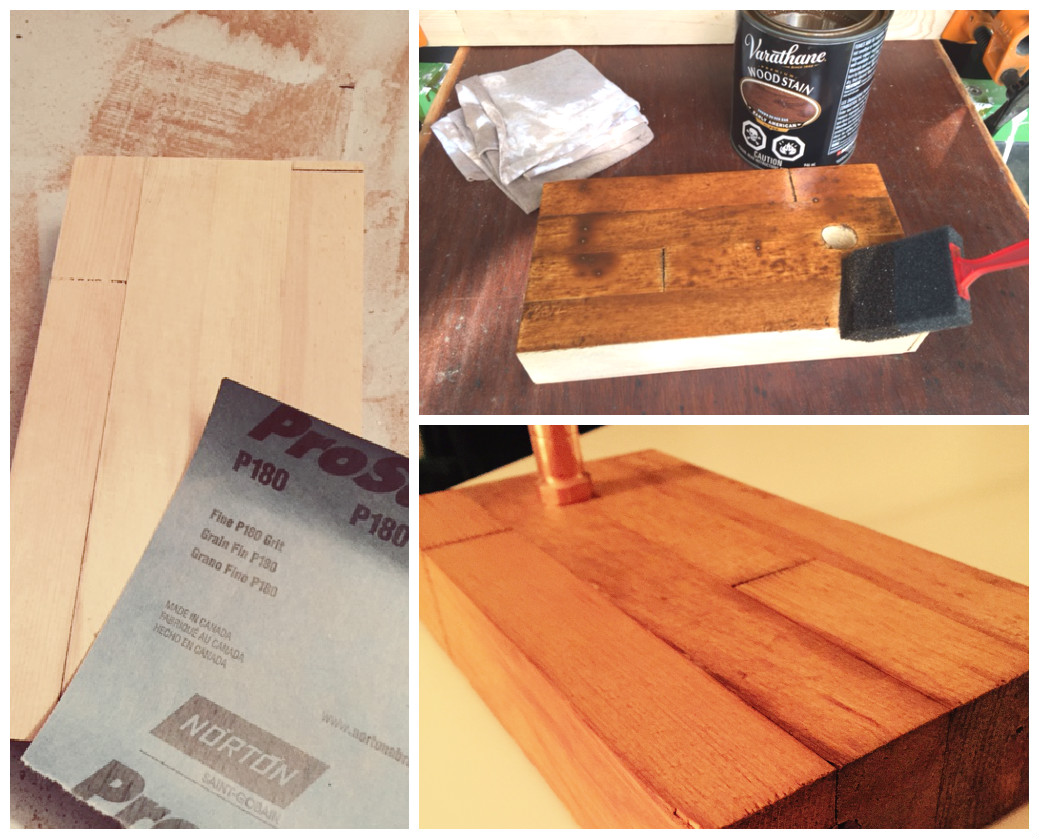
Sand the wood with some fine 180-grit sandpaper until smooth. Wipe off the dust with a rag and apply a stain of your choice with a foam applicator. I used Varathane early American.
Pro’s tip: You can also use your router to bevel the edges of the base before applying the stain.
Fit the adapter
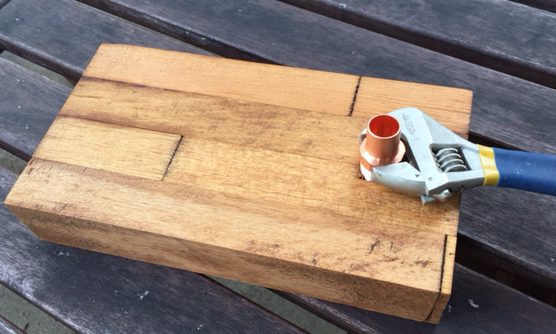
Screw the male adapter fitting into the hole, at first by hand and then with the help of a wrench. You may need to use a rounded file or sand paper to enlarge the hole a bit to make the adapter fit, but careful not to make the hole too big!
Cut the pipes to length
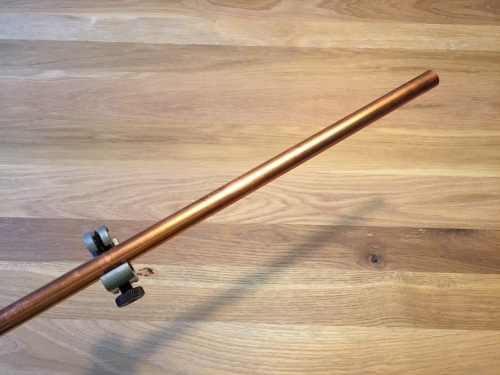
Use a pipe cutter or a hack saw to cut the 3′ pipe. You will need the following lengths: 15″, 6″, 2 ½” and 2″.
Tip: If there’s any writing on your copper pipes (mine proudly boasted MADE IN CANADA in bold red letters) you can gently rub it off using extra fine steel wool.
Thread the wire
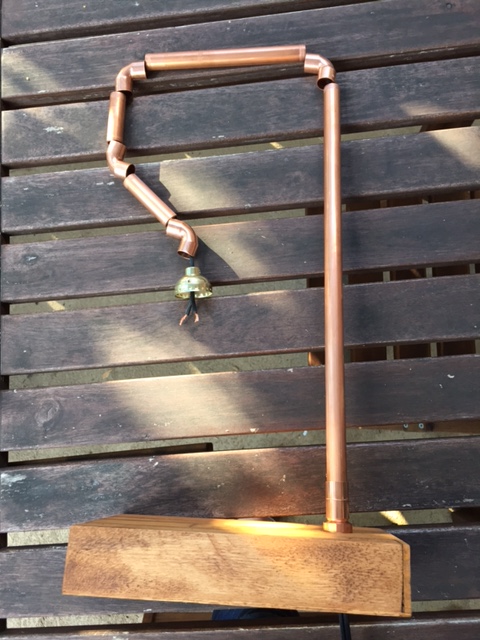
Thread the lamp wire up through the adapter. Next, slip on the coupling followed by the 15″ piece of pipe. Continue to thread the wire through as you go. Next add a 90° elbow, the 6″ pipe, elbow, 2″ pipe, elbow, 2 ½” pipe, and final elbow.
Tip: don’t assemble the pieces until you’ve threaded them all onto the wire or you’ll find it very difficult to pull the wire through. Play around with the design by adding pieces or cutting the pipes to different lengths – be creative!
Wire the lamp socket
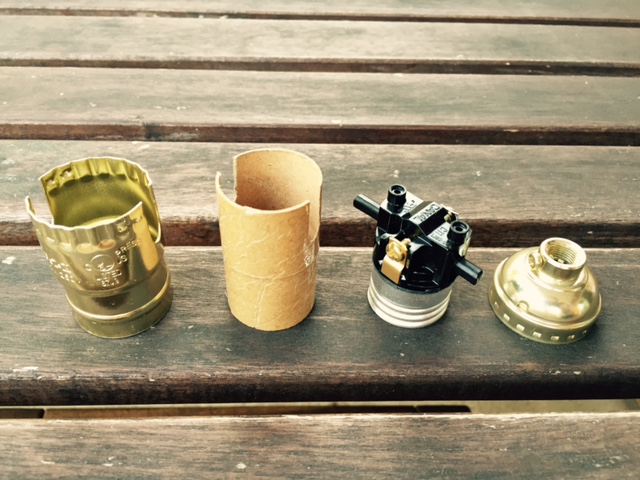
Take the light socket apart by pulling free the base with the help of a small flat head screwdriver. Disassemble all the parts by simply pulling them free. Note the brass screw and the silver screw. This is actually important!
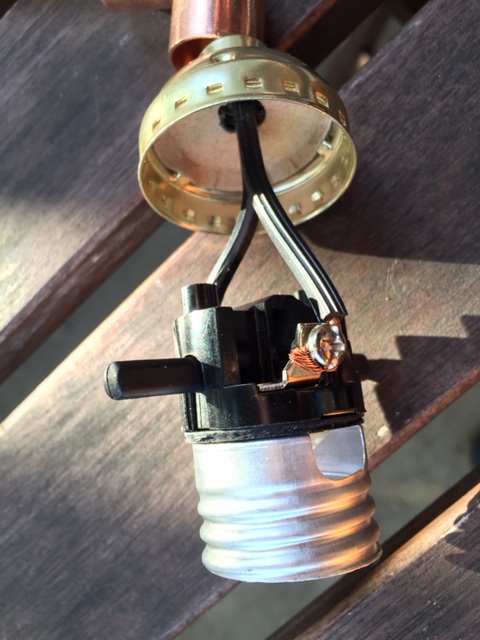
Wrap each of the wires around the correct screw in a clockwise direction and screw it tightly. If you are using a polarized plug which is highly likely (one prong larger than the other), you need to make sure to attach the right wire to the right screw. The neutral wire goes to the silver screw and the hot wire goes to the brass screw. You will usually see ribbing on the side of the neutral wire while the hot wire is smooth. Check out this article from Family Handyman for more guidance if you are unsure. Don’t forget to slip the base of the socket over the wires before attaching the wire to the screws!
Reassemble the light socket by first sliding the cardboard sleeve on, then the metal sleeve. Do NOT throw away the cardboard sleeve – it acts as an insulator.
Now you can start connecting all the pieces together starting at the socket and working your way back to the base of the lamp. Once all the pieces are connected, pull the lamp wire back down through the copper pipe so it’s snug. Tip: Apply a bead of silicone caulk to bond the socket with the copper pipe.
Finishing touches
Finish off by screwing in a vintage light bulb and sticking some felt pads underneath the base. This will raise the base just enough to allow the wire to pass underneath.
Pro’s tip: For a more professional look, make a small groove for the wire on the bottom side of the base using either a router or a chisel.
Finally, turn your industrial chic copper lamp on and relax. Well done.
Did you know DIY Montreal has a new YouTube channel? Click here to check it out!