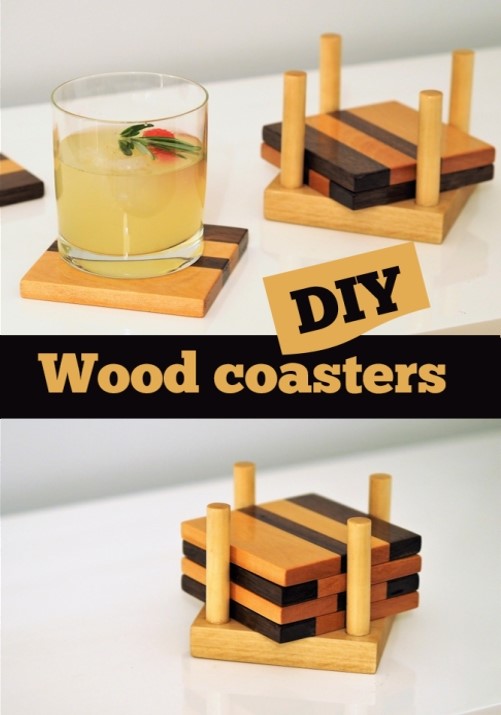
Looking for a perfect last minute gift idea? DIY wood coasters are fast and easy to make using scrap wood, and make the perfect DIY gift! Unlike cutting boards, you can use any type of wood, as long as you coat your wooden coasters with poly. In this tutorial I’ll show you how to make a set of 4 DIY wooden drink coasters in no time. And hey, if not for Christmas, by New Year’s night 😉
Watch the video below, or read on!
Click here to SUBSCRIBE to my YouTube channel for more DIY videos!
Before we get started, here are the tools and materials you will require for this project
Materials
- Scrap pieces of wood at least 16 inches long and 1/2 inch thick
- Piece of wood at least 4 x 4 inches and 3/4 thick
- Wood glue http://amzn.to/2D012DV
- 1/2 inch dowel rod http://amzn.to/2BzQoI1
- Danish oil (optional) http://amzn.to/2BYBtGE
- Polyurethane http://amzn.to/2CYMt3R
Tools
- Mitre saw http://amzn.to/2BkA4Xl
- Table saw http://amzn.to/2CZz5fL
- K-body Clamps http://amzn.to/2BnK81F
- Glue brush http://amzn.to/2DxGlAk
- Planer http://amzn.to/2BkkYRH
- Drill http://amzn.to/2Af75nb
- Orbital Sander http://amzn.to/2iNdH5M
- 1/2 inch Forstner bit http://amzn.to/2BmKoxW
How to make DIY wood coasters
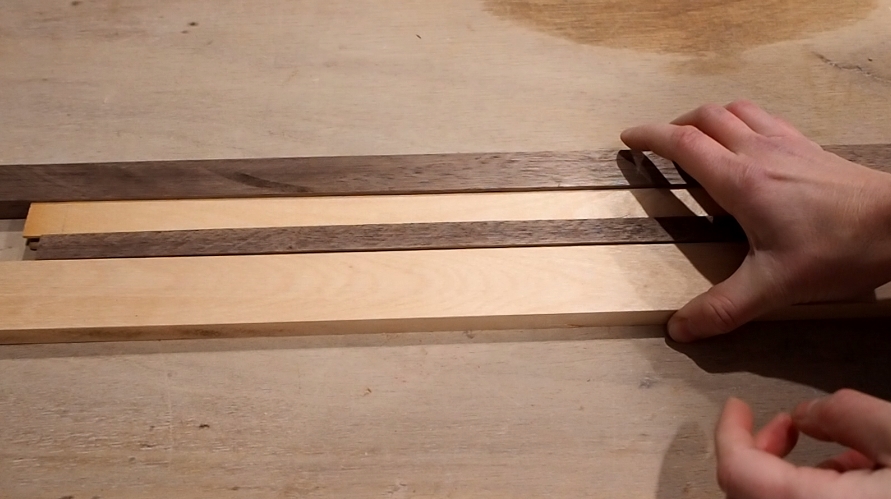
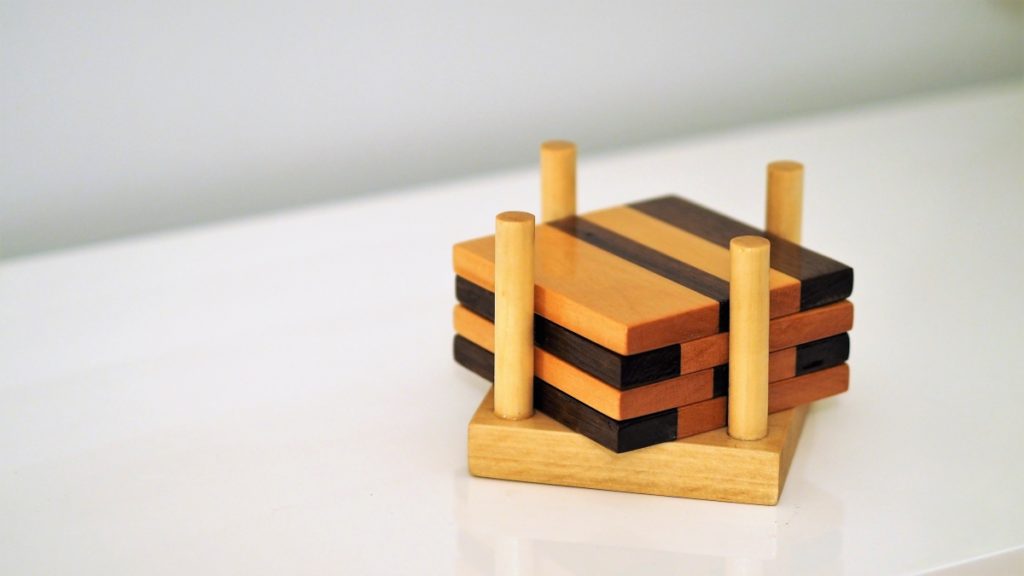
Start by rounding up some scrap pieces of wood. For this project I chose to use maple and walnut. I cut them up into thinner strips so I could make a random pattern, alternating between types of wood. My goal was to make a blank that was at least 16 inches long by 3 and three quarter inches wide, with a thickness of about half an inch.
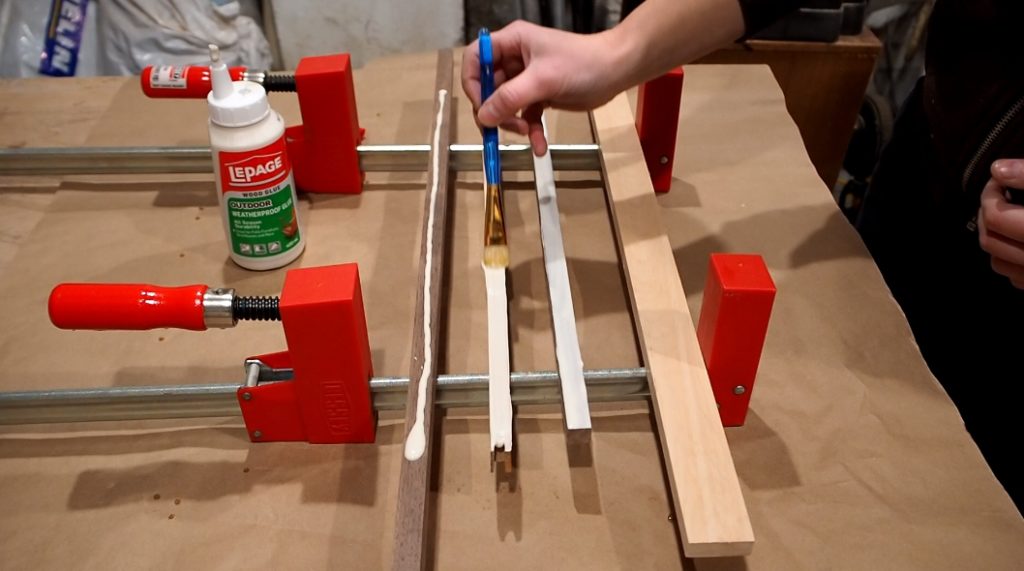
Once I had all my strips ready, I laid some clamps open on their backs. I like to use Bessey K-body clamps for this because they provide a flat stable surface. I flipped all the pieces on edge and applied a generous amount of glue, spreading it over the entire surface with a glue brush.
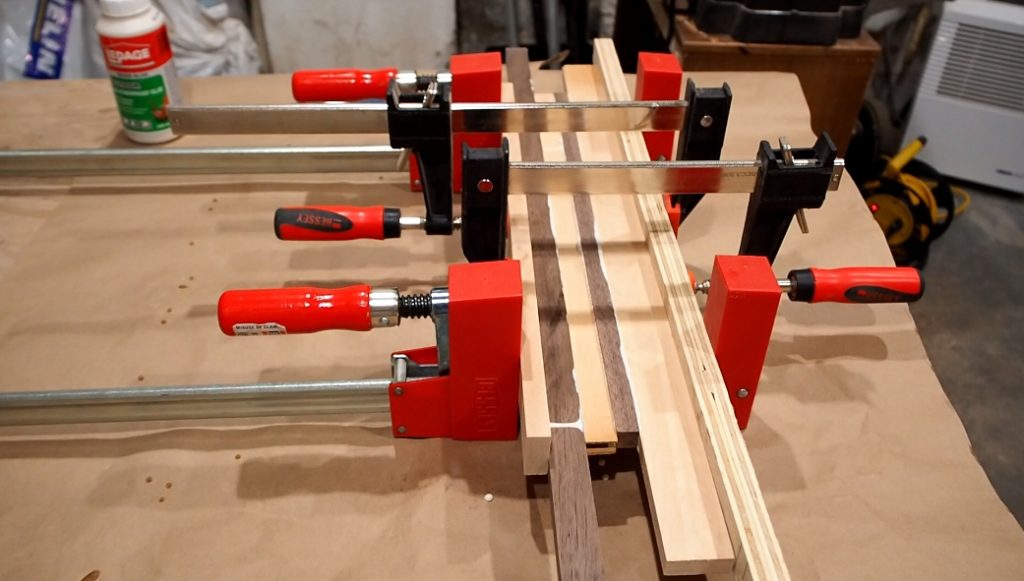
I then flipped the pieces back up and clamped them all together. I always like to add scrap pieces on each end to eliminate the risk of leaving any indentations on the work-piece, especially from these F-clamps that I’m adding.
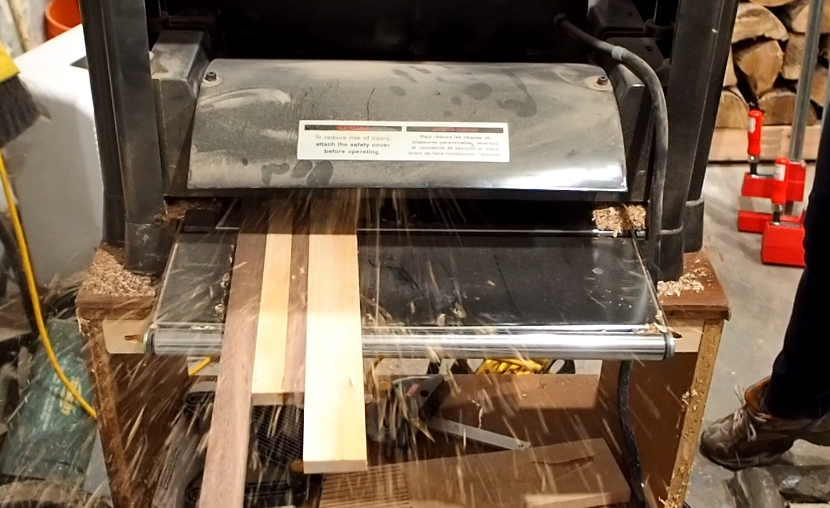
After the glue had dried overnight, I removed the clamps and ran the blank through my planer, alternating sides, until both sides were even and smooth, and until I had reached my desired thickness of about three eighths of an inch.
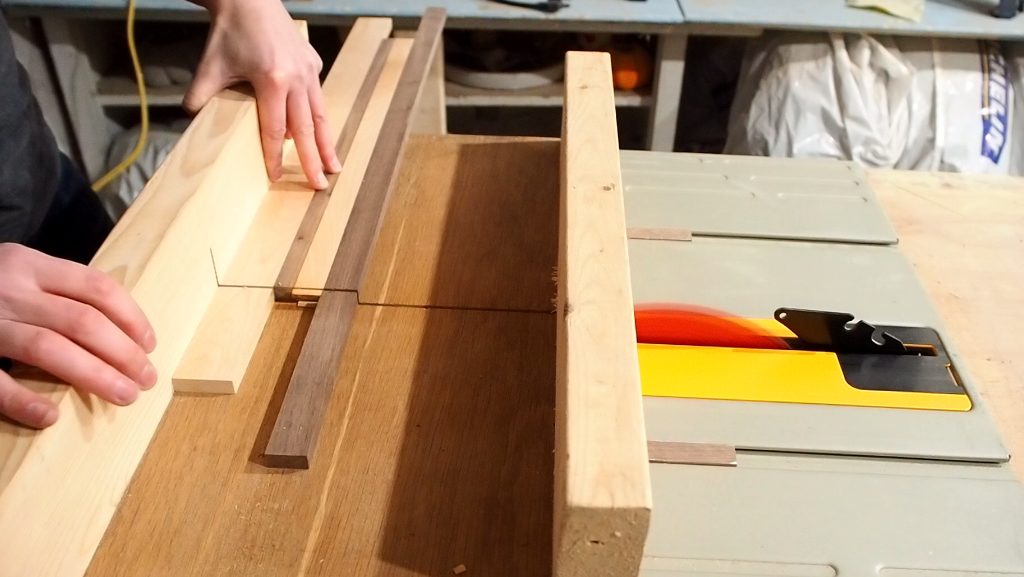
I lightly sanded the blank with my orbital sander before moving over to my table saw. I used a crosscut sled for this, but you can always use a mitre saw instead. I started by squaring up one end of the board.
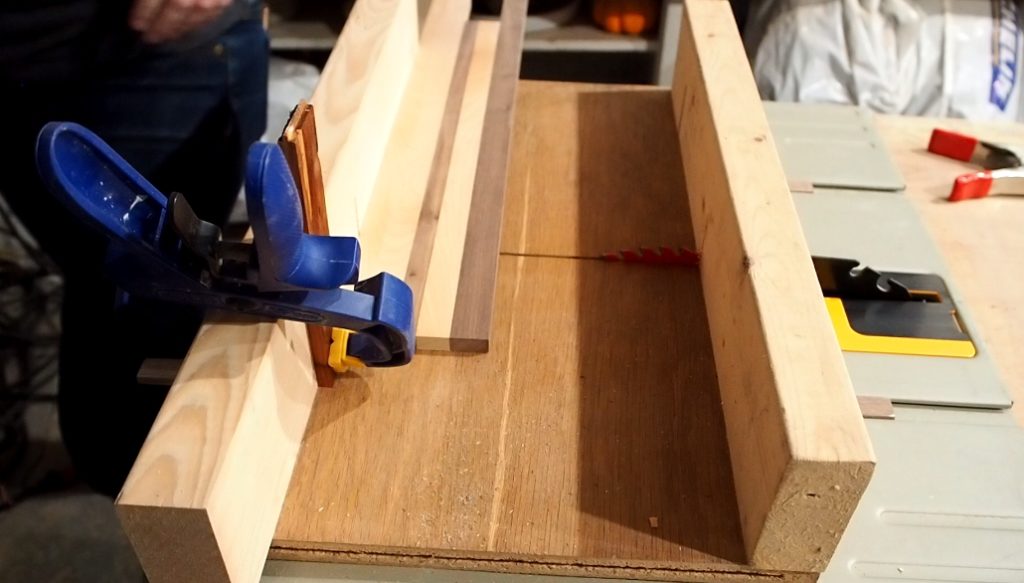
Then set a stop block to 3-¾ inches, which is the same as the width of the board.
I then proceeded to cut the 4 coasters.

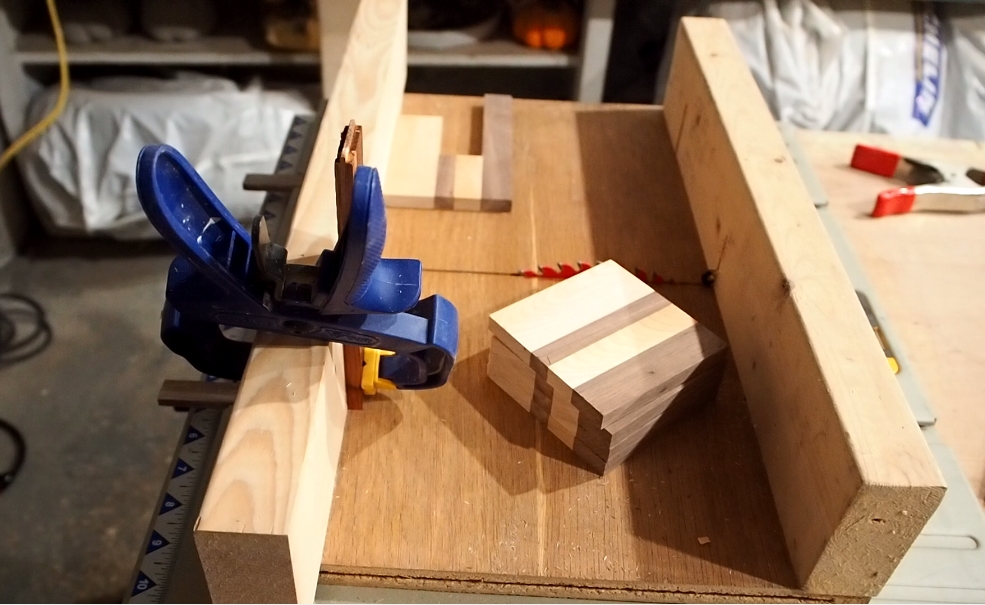
Next I moved onto the base. I used a piece of poplar to match the poplar dowel I would be using. My poplar board was already 4 inches wide, so I simply set a stop block to 4 inches and used my crosscut sled to make the cut.
I did the same for the dowels, setting a stop block at 2-½ inches and using it as a guide to make the cuts.
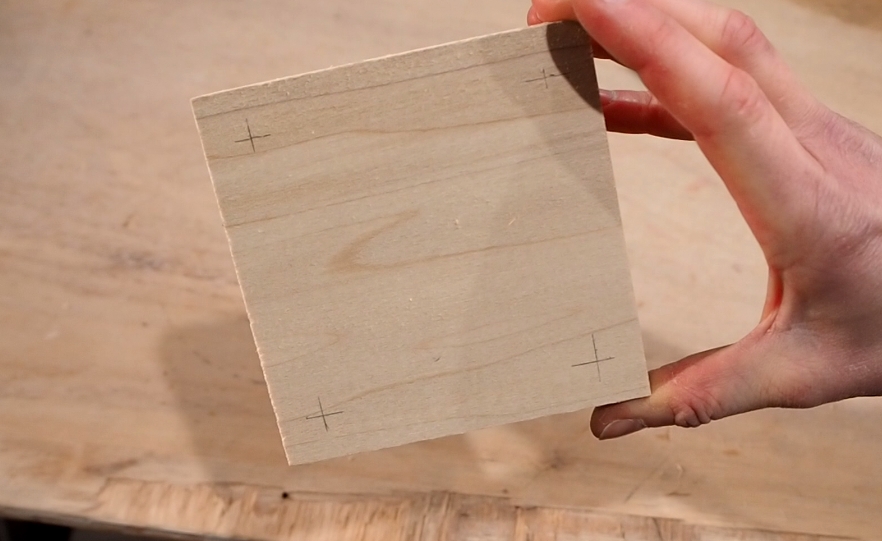
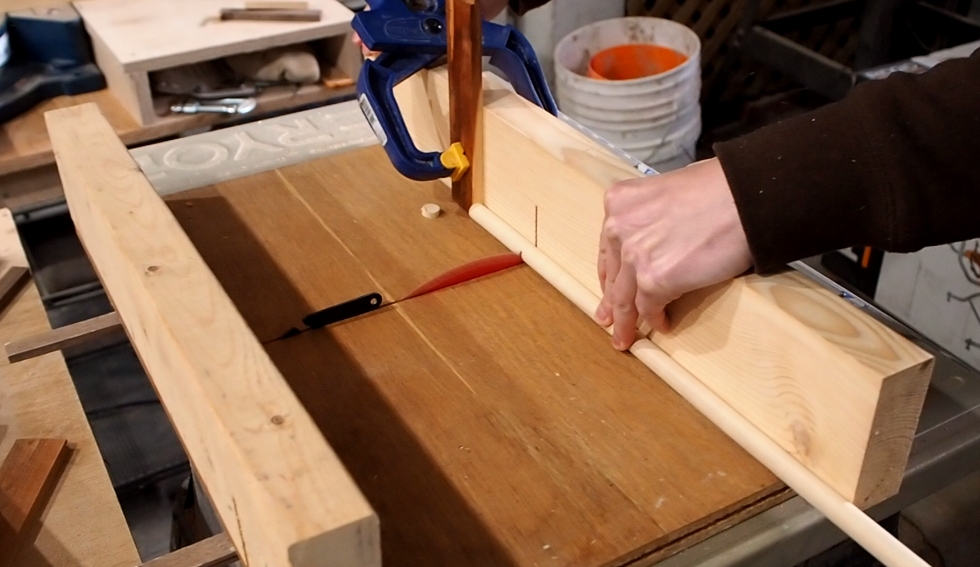
I marked the base for where I would drill the peg holes. I used my combination square and marked one half inch from each edge. I double checked everything would fit using one of the coasters, just to be safe.
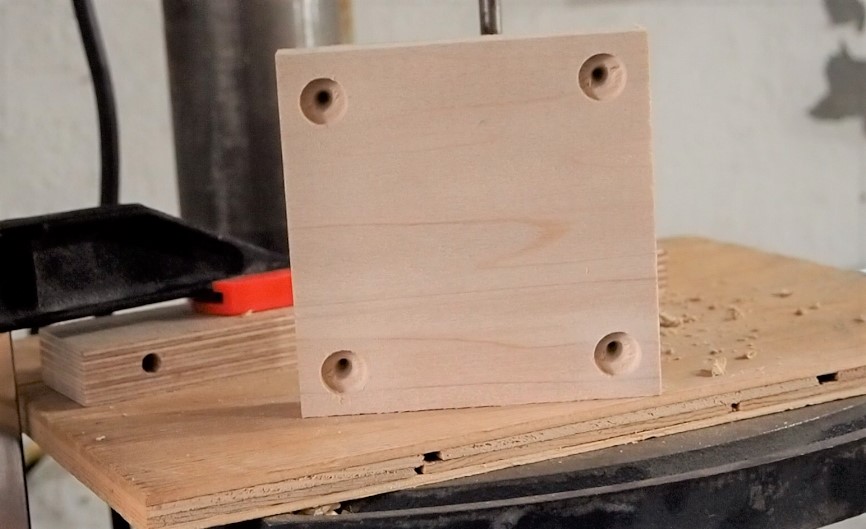
I then headed over to my drill press and made the holes using a half inch spade. A Forstner bit would have been better, but somehow I seem to every size but that one.
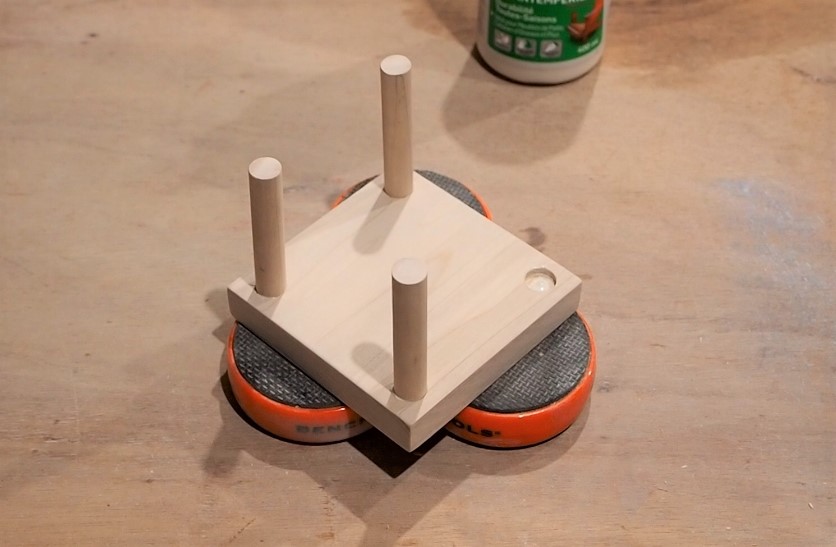
I did a dry fit then sanded the base. I then added some glue to the holes and set the pegs into place. I put a light weight on top and let it dry overnight.
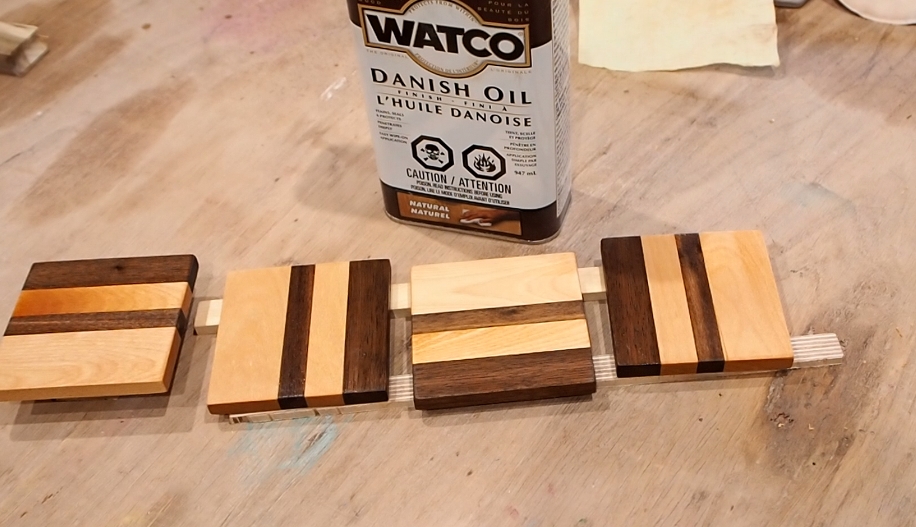
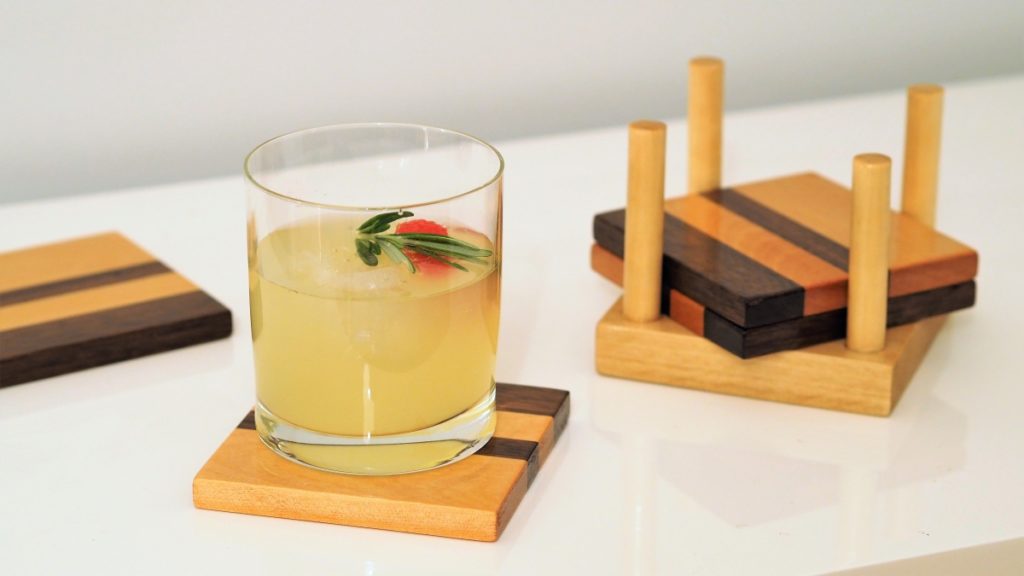
They look so amazing already, I almost want to leave them as is, but that would be a terrible idea given these will be in contact with moisture. You could go straight to poly, but I wanted to give the grain a more rich color, so I started by applying some natural-color Danish oil. I let it dry for 3 days as recommended, then added a top coat of oil-based poly.