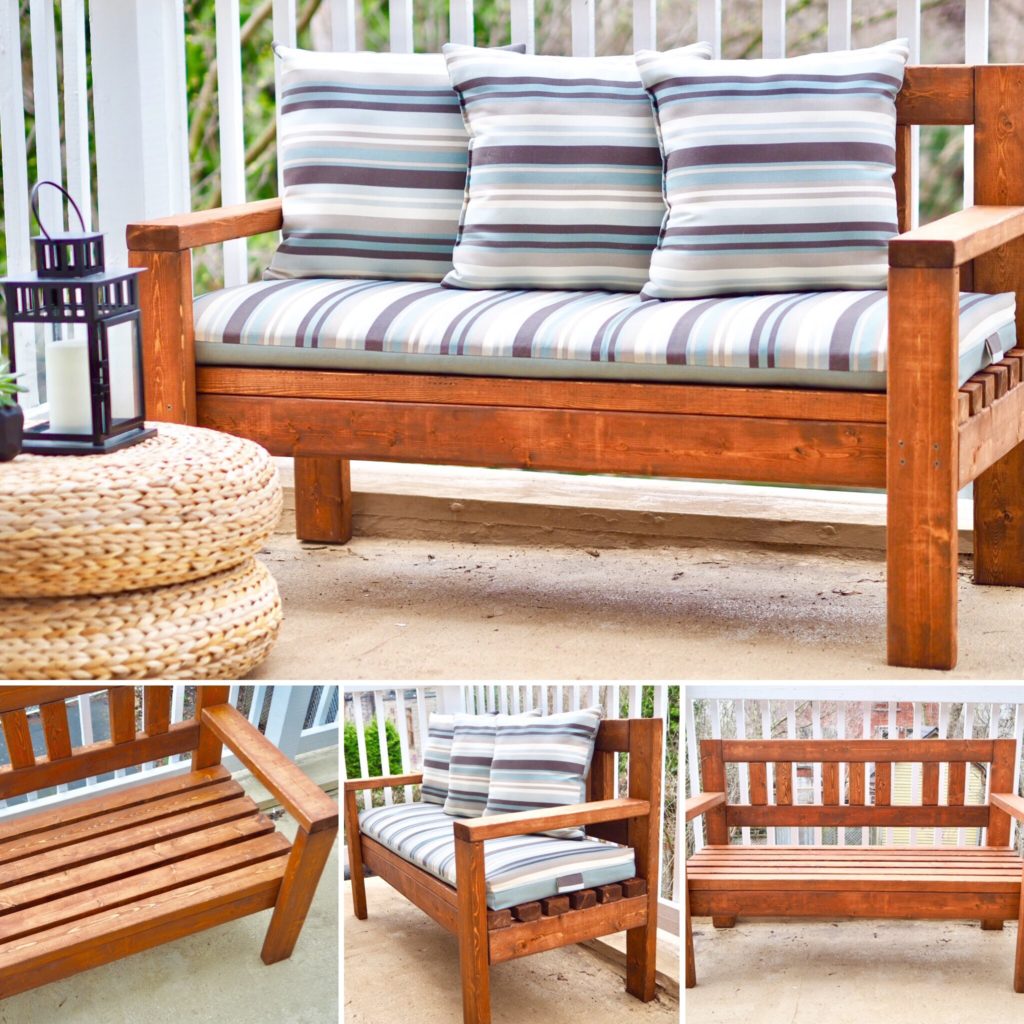
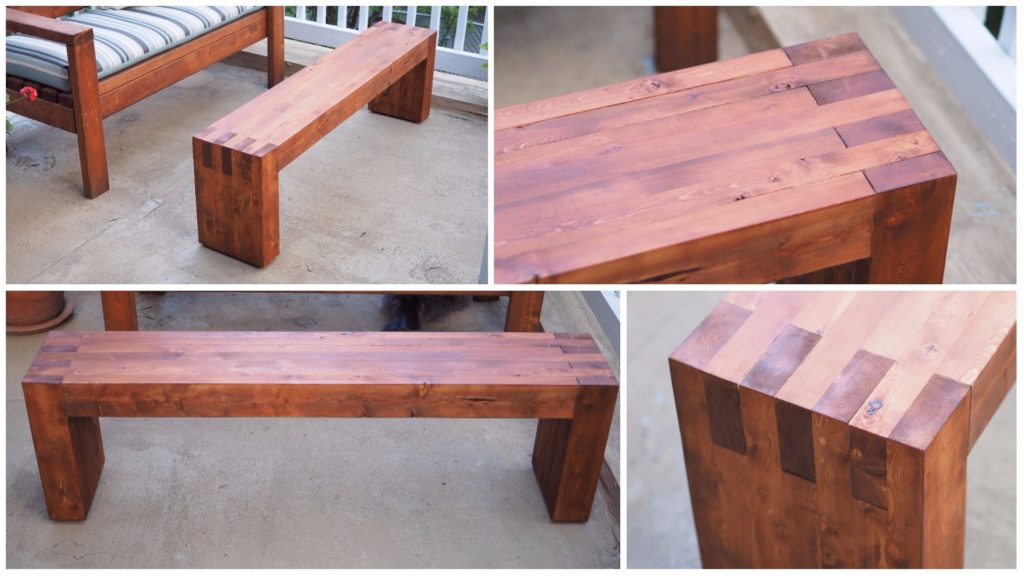
2×4 Modern Finger Joint Bench
Want a modern expensive looking outdoor bench that actually costs very little to make? Not to mention it can just as well be used as a coffee table. Got your attention? Read on!
Click here to SUBSCRIBE to my YouTube channel for more DIY videos!
The materials are simple. All you need to make this awesome DIY wood bench are 2x4s and lots of glue. Here’s what you’ll need to complete this build:
Materials
Tools
- Jointer & Planer (or alternatively a table saw)
- Mitre saw
- Power sander
- Mini foam roller
- Clamps
- Speed square
- Sandpaper
- Stain applicator
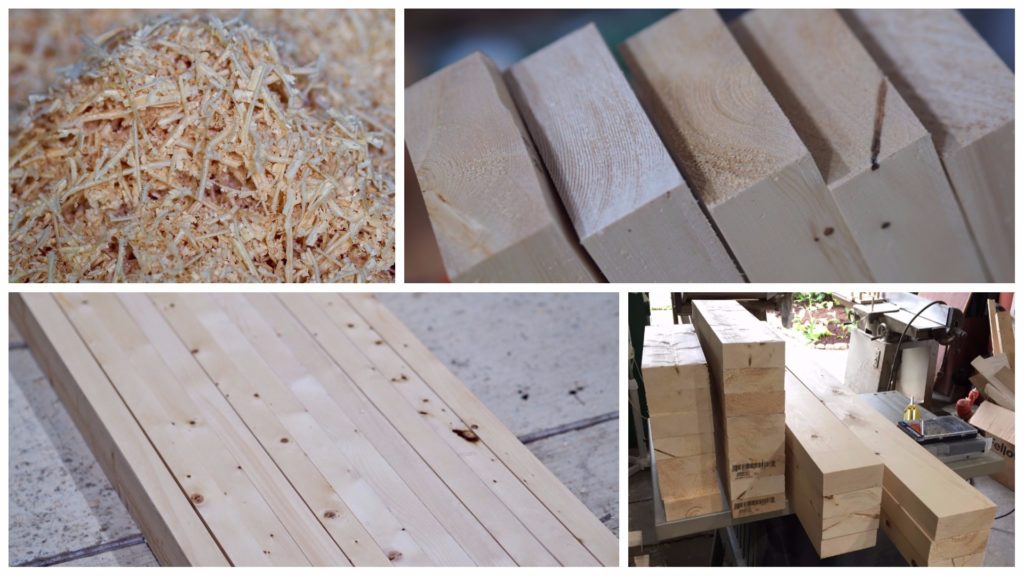
Step 1: The Milling Process
Start by milling your 2x4s to take off the round edges and make the surfaces perfectly flat and the edges square. This will also ensure that all your pieces are exactly the same thickness and width.
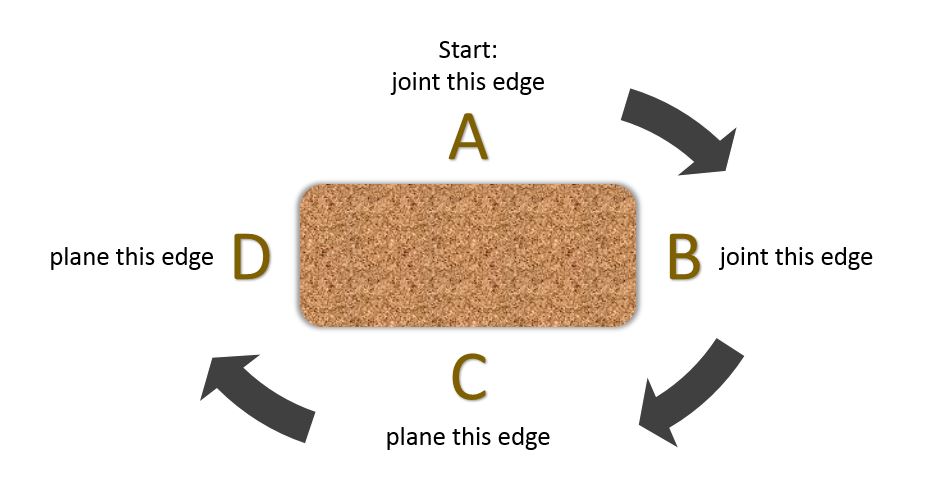
Milling process
Follow the diagram above. Start by flattening side A on the jointer, then side B. Next, run the boards through your planer with side A down in order to level side C. Finally run all the boards through your planer with side B down to level side D.
Alternatively, if you don’t have a planer and jointer, or just think the above is overkill, use your table saw. Start by shaving off a bit of side B to eliminate the round edges. Do this for all six 2x4s. Then set your table saw to around 3-1/4″ and cut off side D.
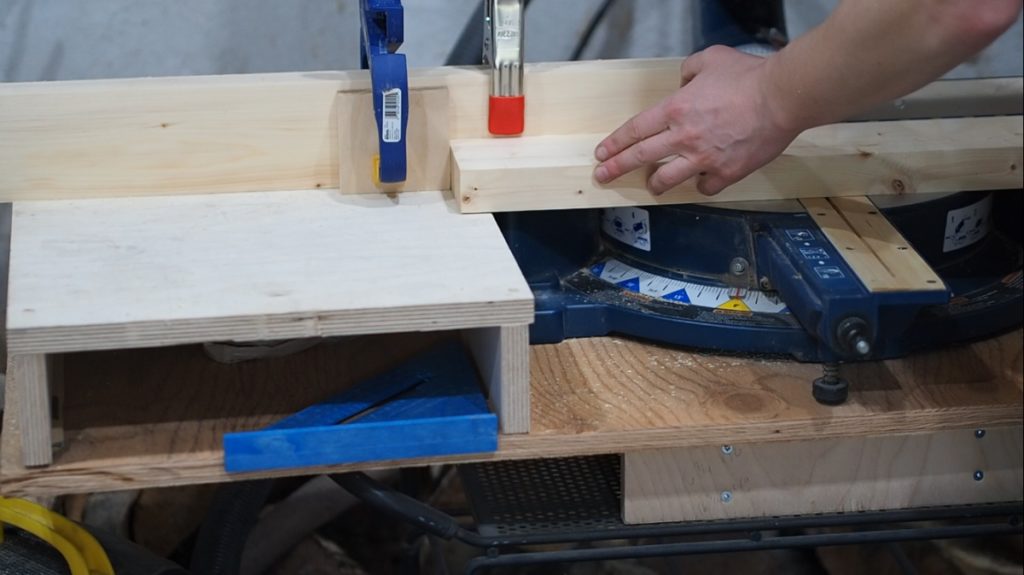
Step 2: Cut to Length
Now that all your 2x4s are square and true, head over to your miter saw to cut the pieces to length. This bench will be 48 inches long and 14 inches tall. The width will be 7 boards on edge, which works out to about 9 inches after the milling process.
Here is the cut list for this bench:
- 3 @ 48″
- 4@ 41-1/2″ (48″ minus 2 times the width of your boards)
- 8 @ 14″
- 6 @ 10-3/4″ (14″ minus the width or your boards)
Tip: Use a stop block and cut in batches to get consistent length cuts.
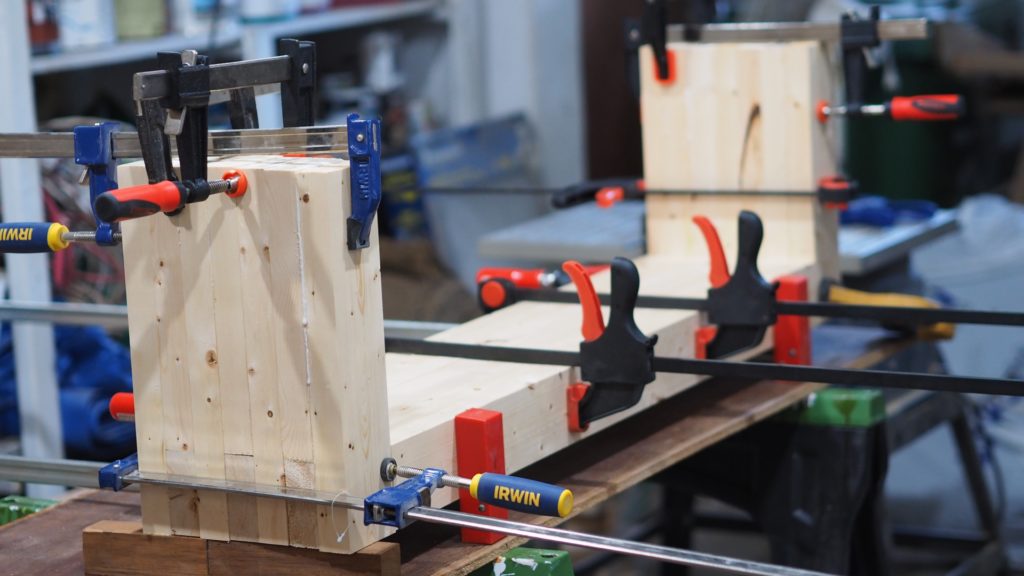
Step 3: Glue-up
Oh the glue-up process. This is the most challenging part of the build as far as I’m concerned. Take the stress out of it (at least some of it) by dry-fitting and clamping it all up first. Get your clamps ready and into position and make sure you have a lot of glue on hand!
Start by gluing a 48″ piece with a 42″ piece and clamp it. Use a 14″ board to get the spacing right on each end. Continue adding layers making the bench wider. Remove the clamps, add a board, and clamp. Repeat. regularly check for square using a speed square to make sure the legs are at 90 degrees.
Tip: use a mini foam roller to spread the glue evenly across the entire surface of the 2x4s.
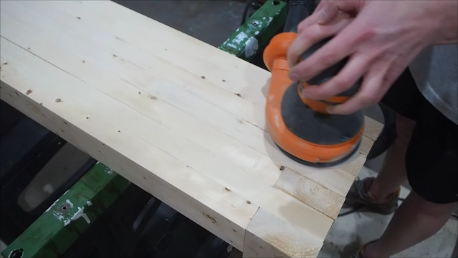
Step 4: Sanding
After you let the glue dry overnight, remove any excess dry glue with a scraper, then sand like there’s no tomorrow. Use and orbital sander, or ideally a belt sander, starting with 60-grit and working your way up to 220 grit for a smooth finish. Aim to get all surfaces flat and even, and the edges perfectly square.
Step 5: Apply Furniture Protector
You can start by staining and then applying an exterior wood product like Thompson’s Water Seal, or skip a step and go with IKEA’s 2-in-1 VARDA outdoor stain and furniture protector. Just rub it on with a clean cloth and it’s ready for use in 24 hours.
Step 6: Add threaded glides (optional)
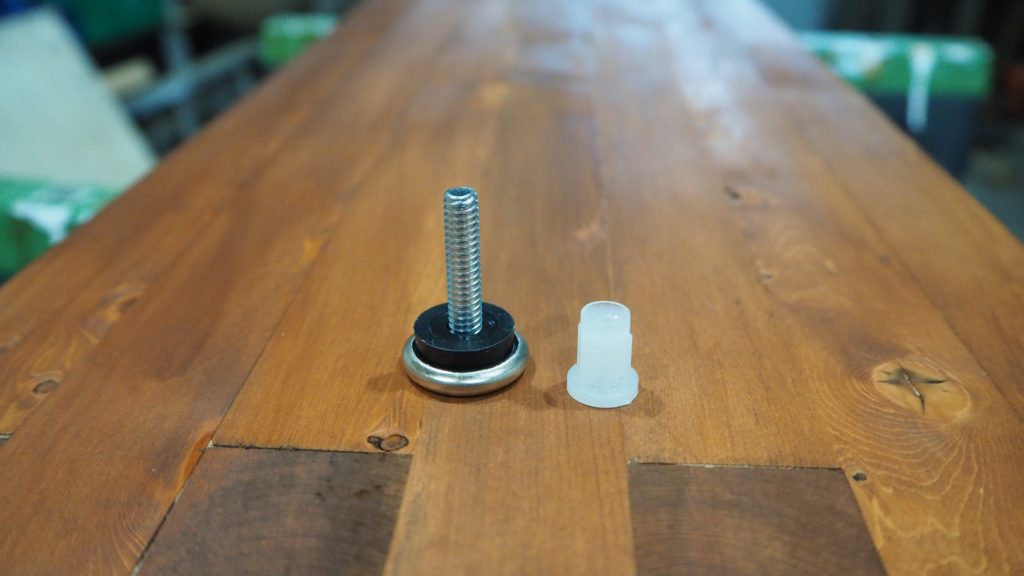
Adding threaded glides is a cheap and easy way to keep the bench from direct contact with the ground. This will prevent water from wicking up into the wood and causing damage long term. It will also allow you to adjust the feet in case your surface isn’t perfectly level.
Simply drill some holes into the underside of the legs, tap in the plastic anchor, then screw in the glide. It’s that easy!
The hard question is: What will you use your modern build for? A bench? A coffee table? A foot rest? I vote for all of the above!
Click the image below to watch the YouTube video
Related post: DIY Outdoor Seating