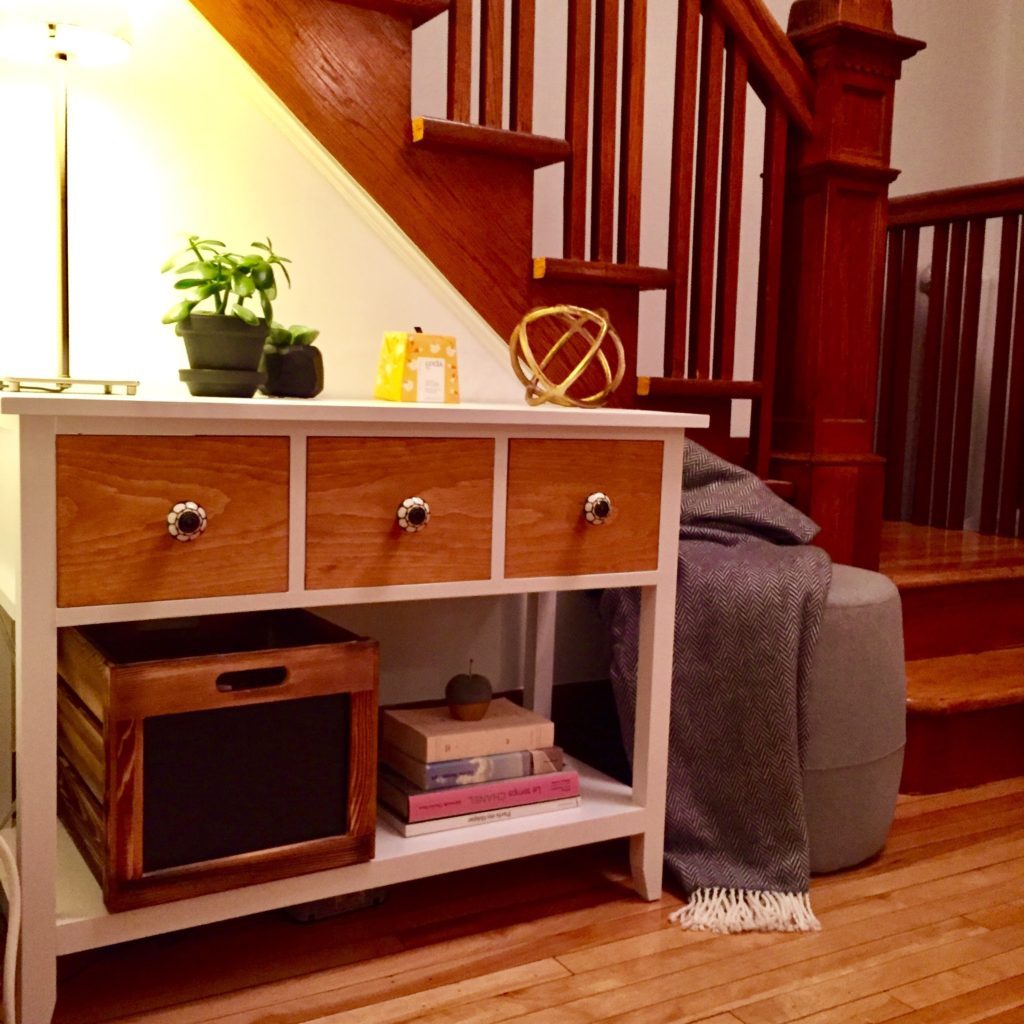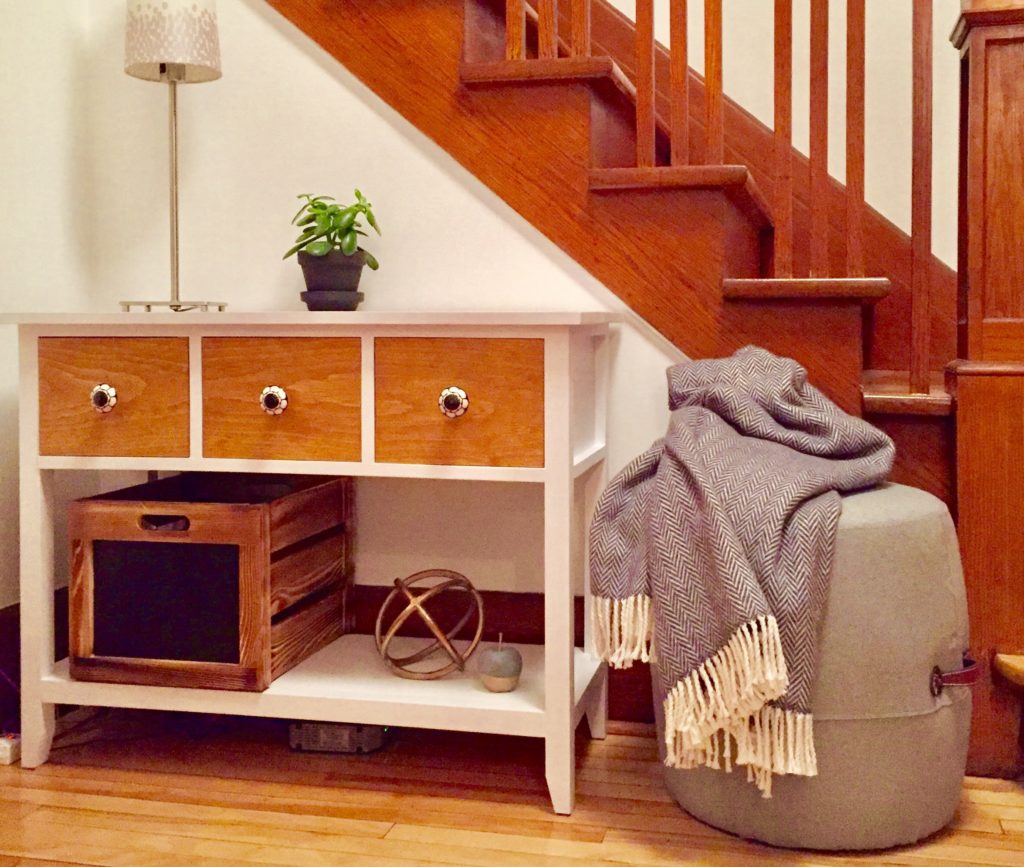
Ever feel like you can never find the right piece of furniture to fit into your space? For months I have been searching for the perfect little compact console table, but could never seem to find one small enough. Then I came across these awesome plans for a cute little sideboard and I thought to myself that’s exactly what I need for my entryway! Well, almost exactly. Just a bit smaller, but deeper, and with a shelf on the bottom. Oh, and maybe mine will be white, with stained wood drawers. Yeah, that sounds about right.
Once I had that figured out, I adapted the building plans from Jaime Costiglio. You will find the detailed step-by-step plans to follow on her blog that’s my letter and on buildsomething.com
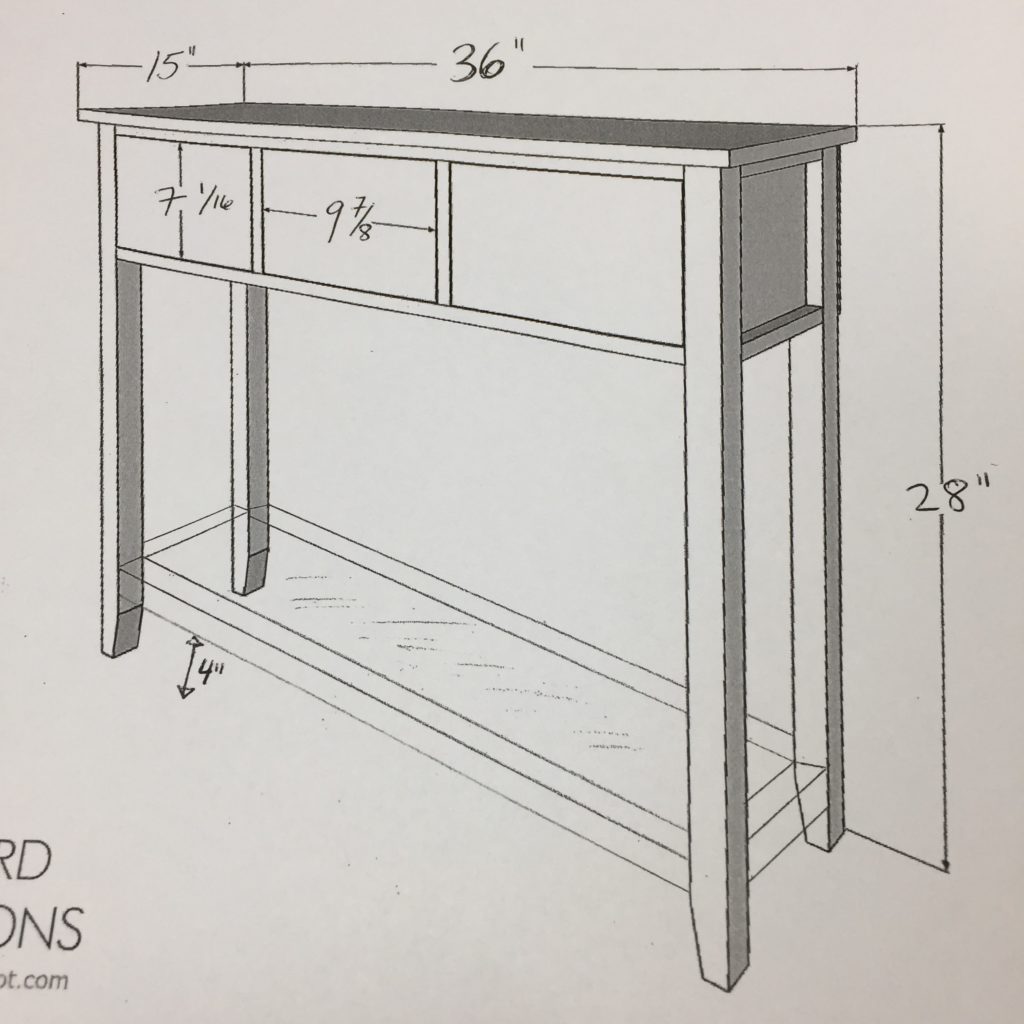
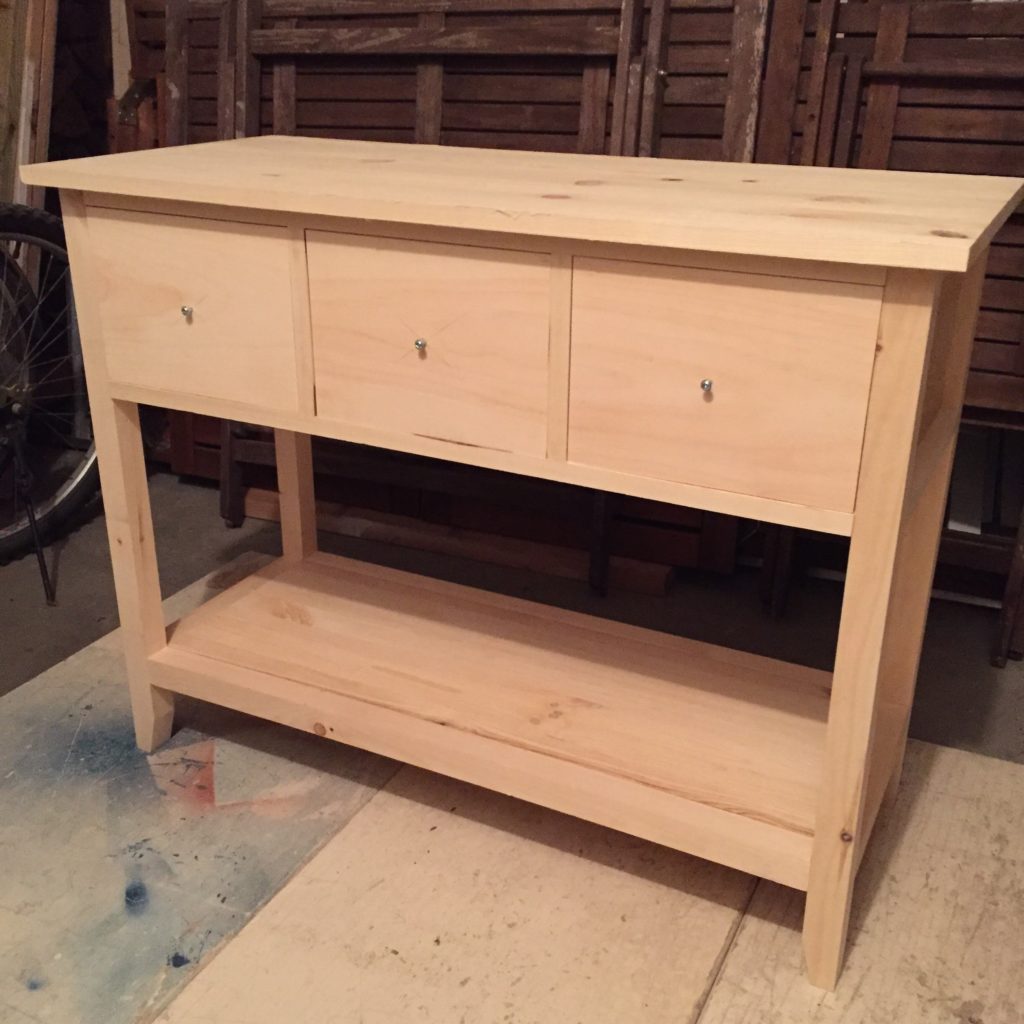
Below I have listed the adapted materials list and cut list specific to my adapted version. The final dimensions of this modified version are 36″ wide by 15″ deep by 28″ tall.
Here’s what you’ll need:
Materials
3 – 2x2x8 board
3 – 1x2x8 pine board
1 – 1x3x6
1 – 1x8x6
1 – 1×16 laminate panel @ 36″
1 – 1×12 laminate panel @ 36″
1 – ¼” plywood handy panel @ 2′ x 4′
2 – 1x6x8
1 ¼” pocket hole screws
1 ¼” wood screws
2″ wood screws
1 ¼” finish nails
Wood glue
3 Drawer pulls
Cut list
4 – 2×2 @ 27 ¼”, one end tapered (legs)
4 – 1×2 @ 11″ (side top trim & top cross support)
4 – 1×3 @ 11″ (side bottom trim & bottom cross support)
2 – 1×8 @ 11″ (sides)
4 – 1×2 @ 31 ½” (cross supports)
4 – 1×2 @ 7 3/16″ (drawer dividers & drawer stops)
2 – 1×3 @ 7 3/16″ (drawer stops)
4 – 1×2 @ 11 ¾” (drawer guides)
1 – “laminate panel” @ 15″ x 36″ (top)
2 – 2×2 @ 31 ½” (bottom cross supports)
2 – 2×2 @ 11″ (bottom side cross supports)
1 – “laminate panel” @ 11″ x 31 ½” (bottom shelf)
Drawer Cut List
6 – 1×6 @ 12 ½” (drawer sides)
6 – 1×6 @ 8 ¼” (drawer front & back)
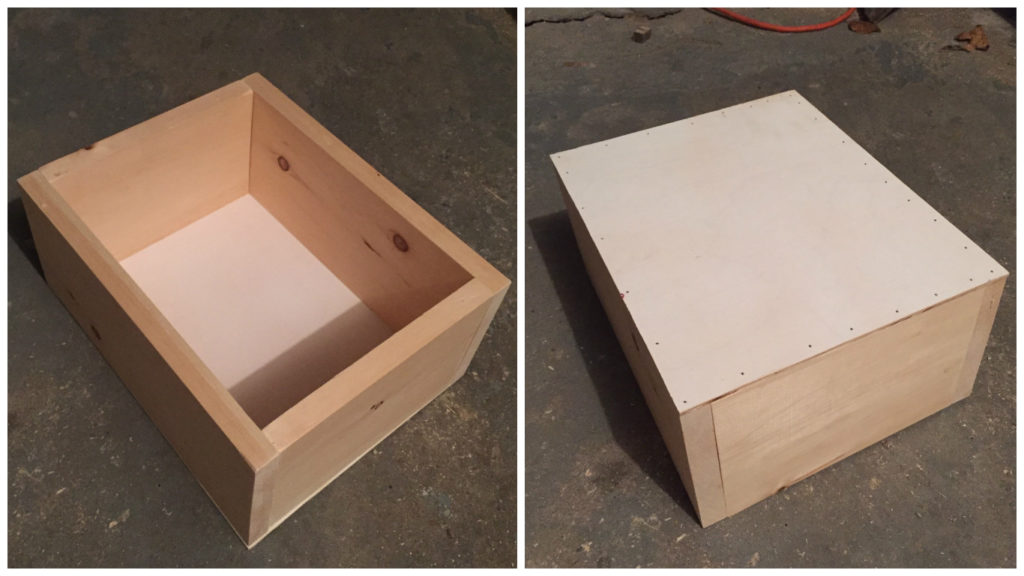
3 – ¼” plywood @ 9 ¾” x 12 ½” (base)
3 – 1×8 @ 9 7/8″ (drawer front)
Follow the building plans available at buildsomething.com using the modified measurements provided and adding Steps 7B & 7C (between steps 7 and 8) in order to add the bottom shelf.
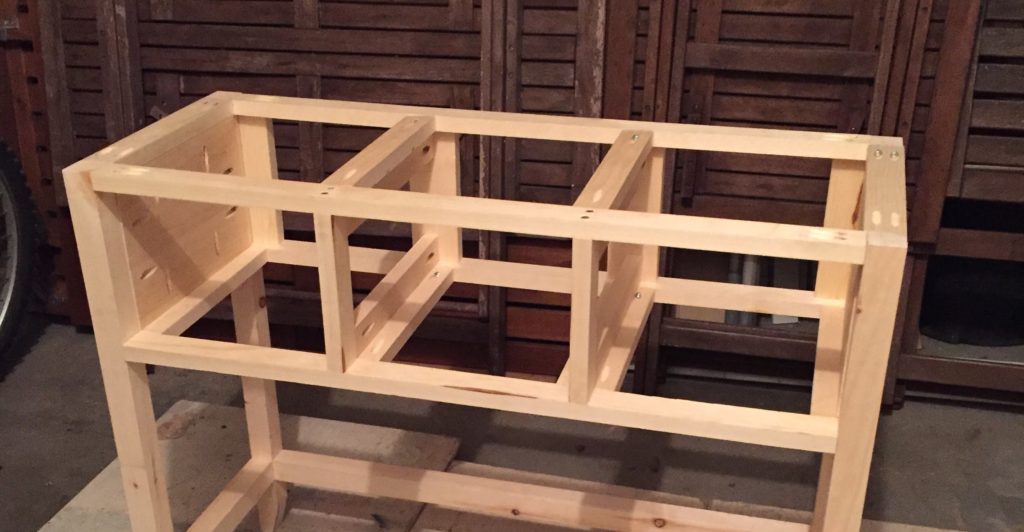
Step 1: Assemble the side panels
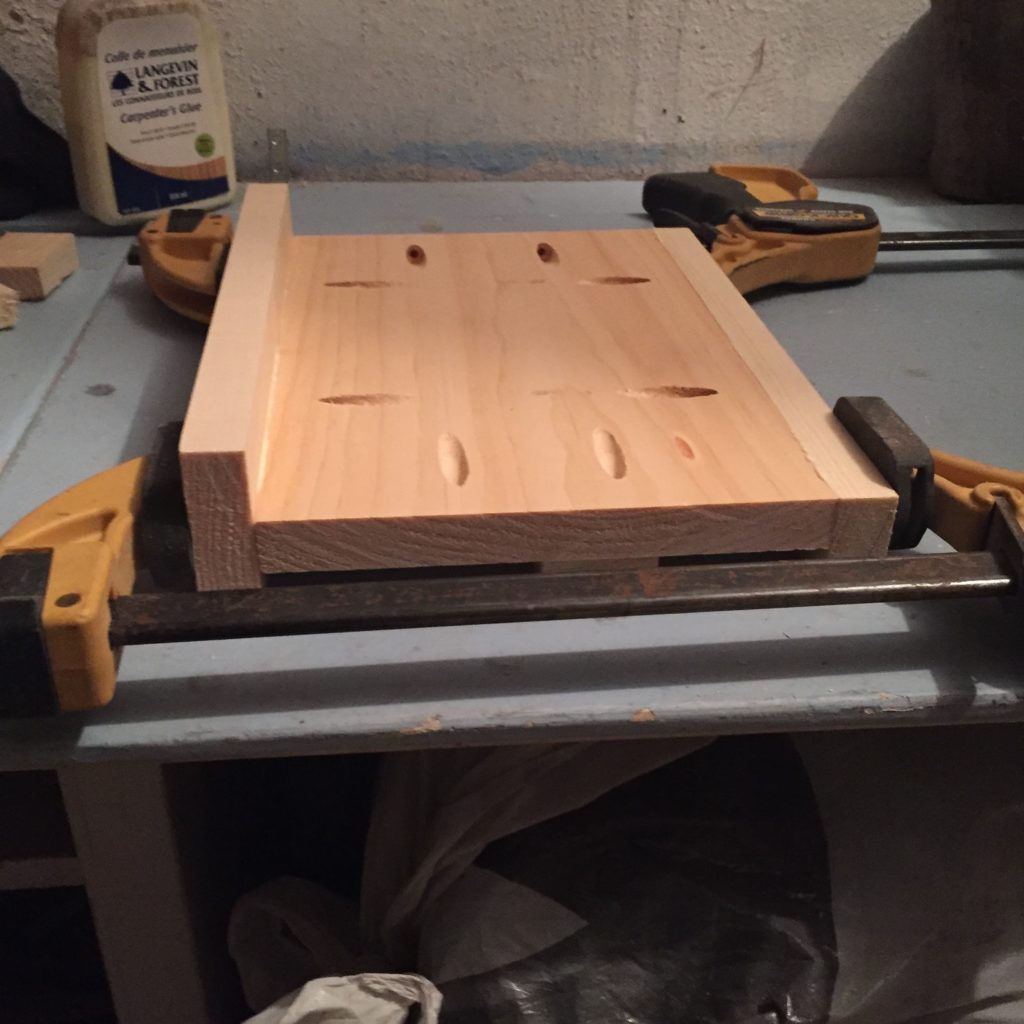
Tip #1: Don’t pre-cut all the pieces. Instead cut as you go, since dimensional lumber widths sometimes vary slightly.
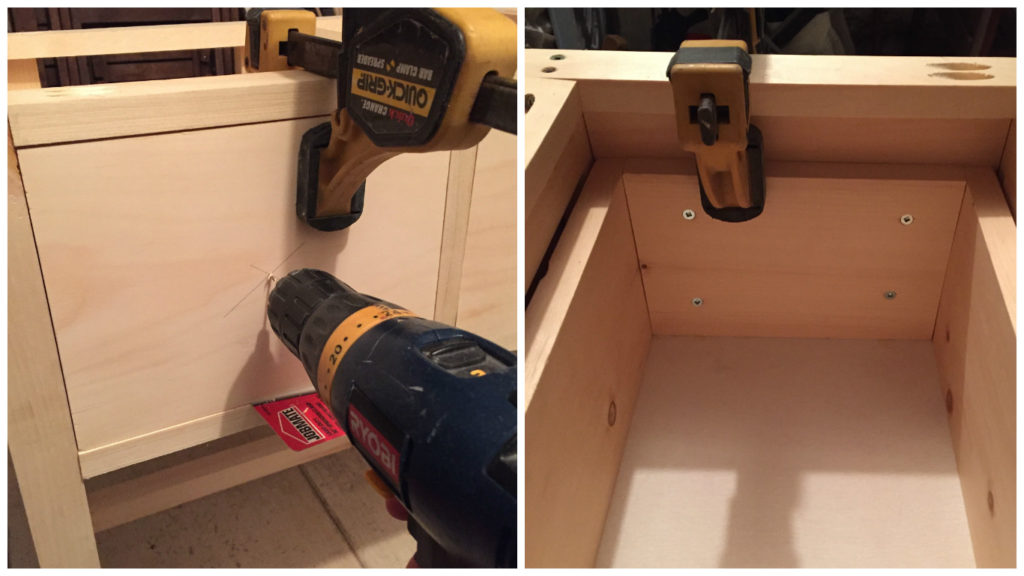
Tip #2: Use bar clamps when assembling the pieces with pocket hole screws to ensure precise alignment.
Step 2: Attach the legs
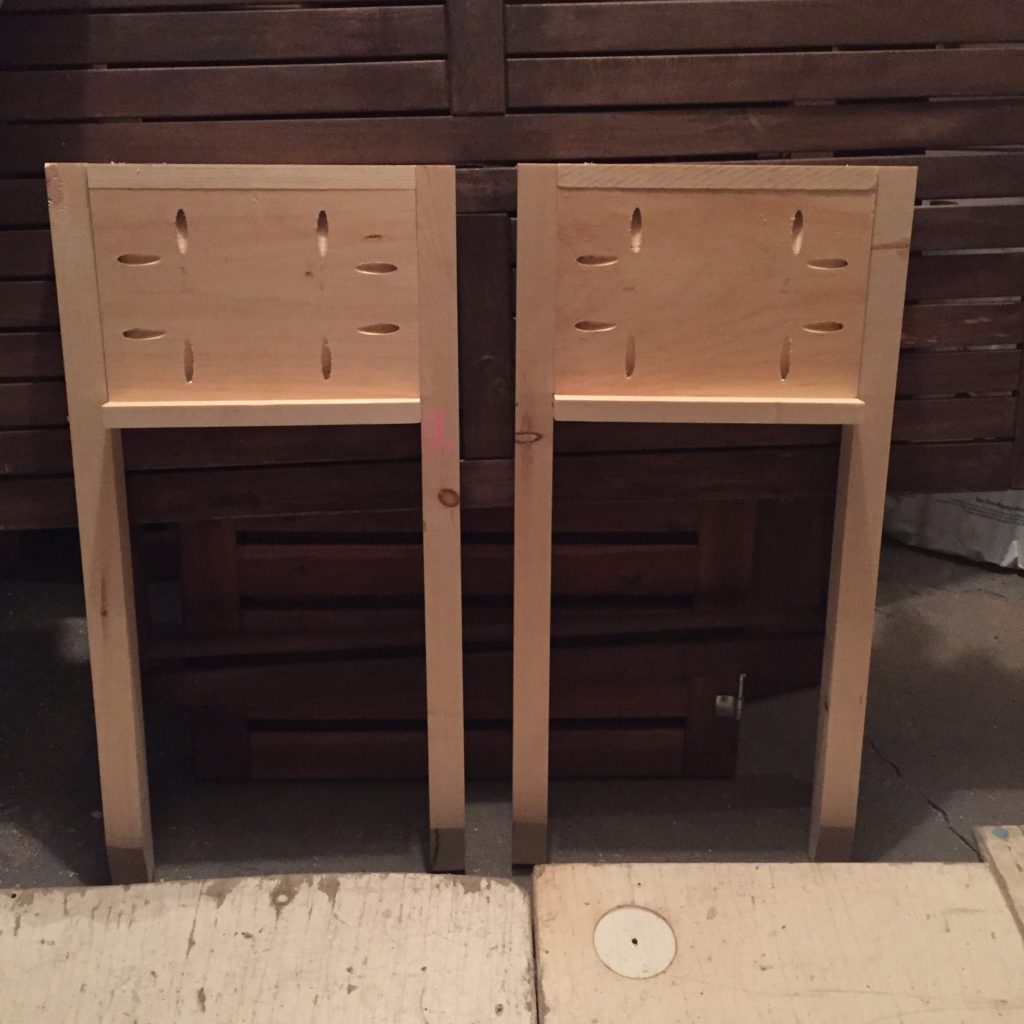
Step 3: Attach cross supports

Step 4: Attach the drawer dividers
Step 5: Attach back drawer stops
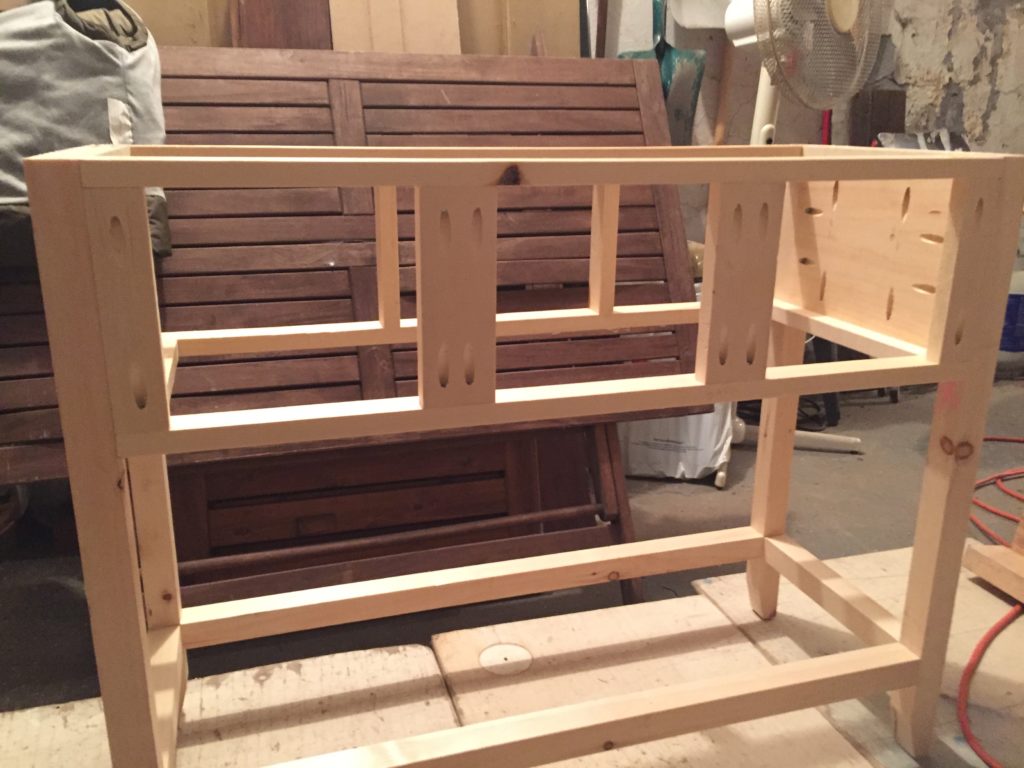
Step 6: Attach top cross supports
Step 7: Attach drawer guides
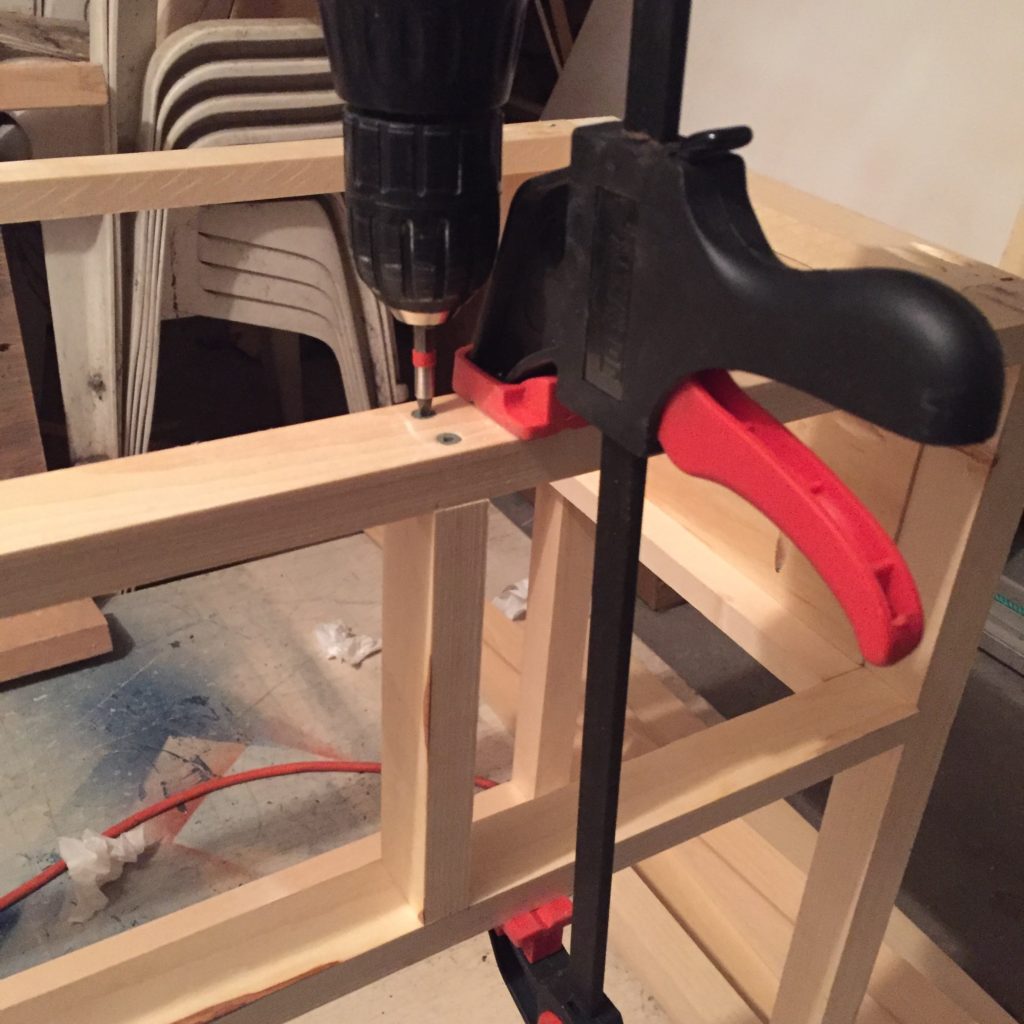
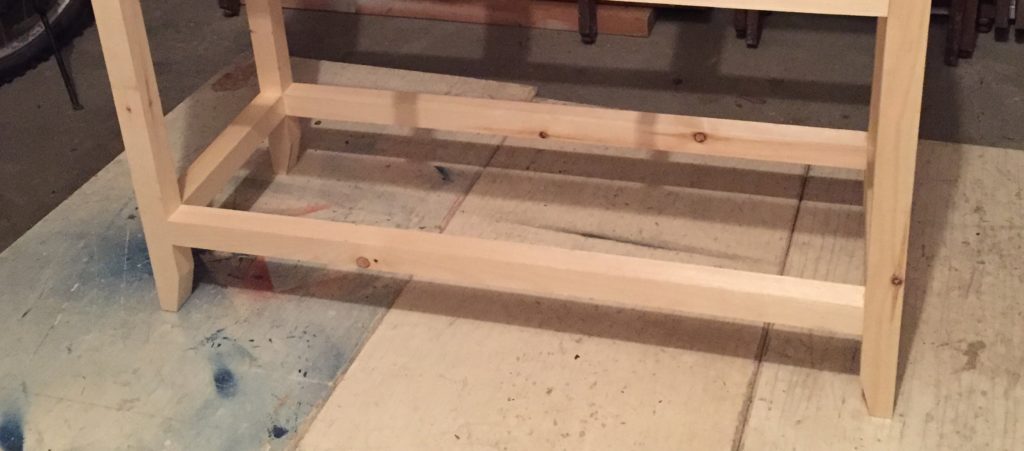
+Step 7B: Attach bottom cross supports
Attach bottom cross supports using wood glue and 1 ¼” pocket hole screws. Leave 4″ spacing between cross supports and bottom of legs.
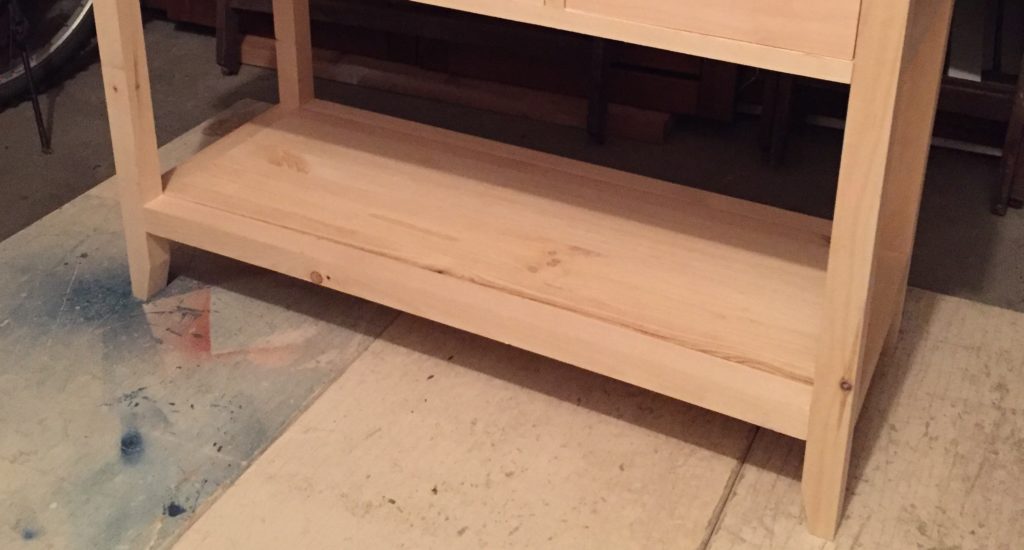
+Step 7C: Attach bottom shelf
Attach bottom shelf to cross supports using wood glue and 1 ¼” pocket hole screws. Use 8 concealed screws on the underside of the shelf.
Step 8: Attach top to frame
Step 9: Attach backing to frame (optional – I skipped this)
Step 10: Make drawer boxes
Step 11: Attach drawer fronts
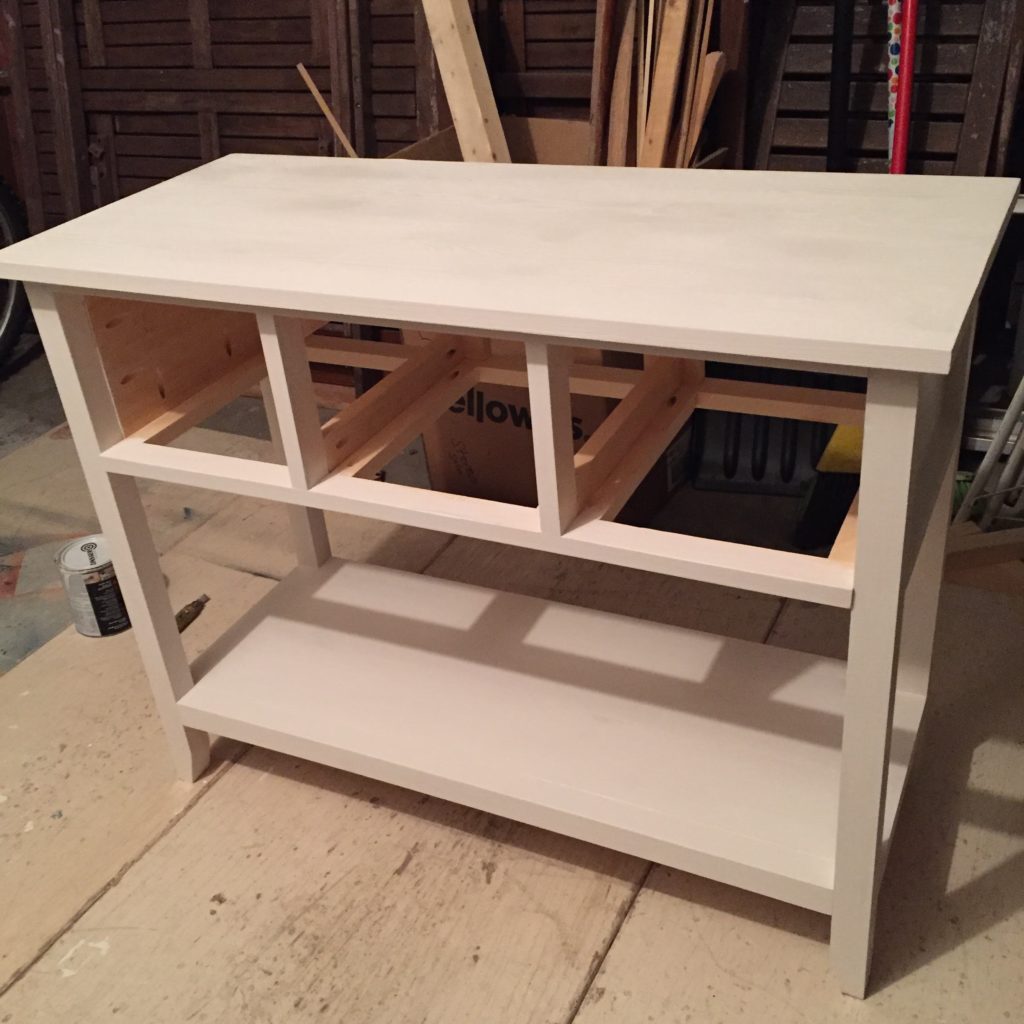
When you’re done it should look something like this.
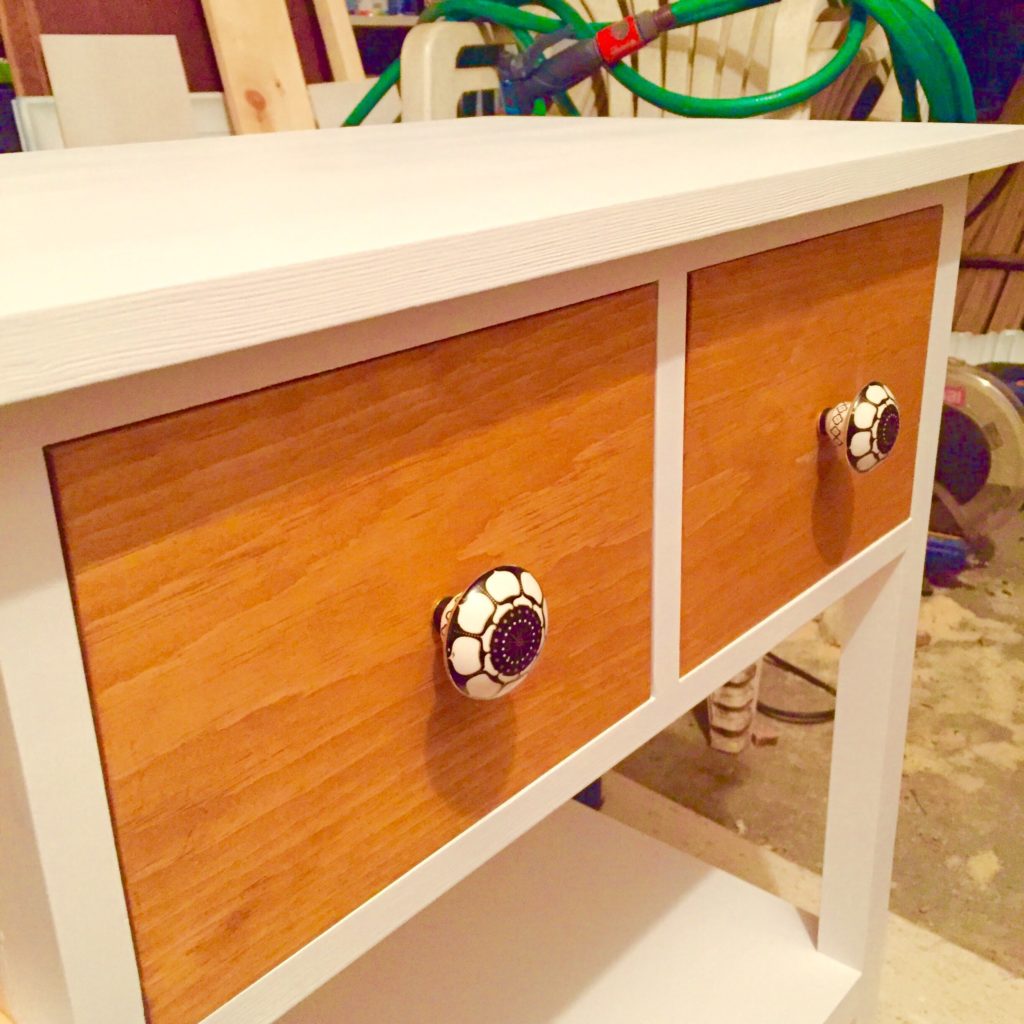
Step 12: Appy finish
I chose to paint the frame and stain the drawers for a retro look. I used Behr Silk moon melamine finish paint for the frame and Varathane Provincial wood stain for the drawer fronts.
Tip #1: Always use apply wood conditioner prior to staining pine wood. Trust me, you will thank me!
Tip #2: Prior to painting you must seal the knots in the wood. Otherwise they will be visible even after multiple coats of paint. I used Zinsser B-I-N primer-sealer stain killer to seal the knots and prime the entire frame prior to painting.
Tip #3: For a professional paint finish, lightly sand between coats using extra fine sandpaper (280-320 grit). Wipe down with a lightly damp cloth to remove the sanding dust.